Recovering from a Cold or Flu at Home
Rest, Fluids, and Over-the-Counter Relief Explained
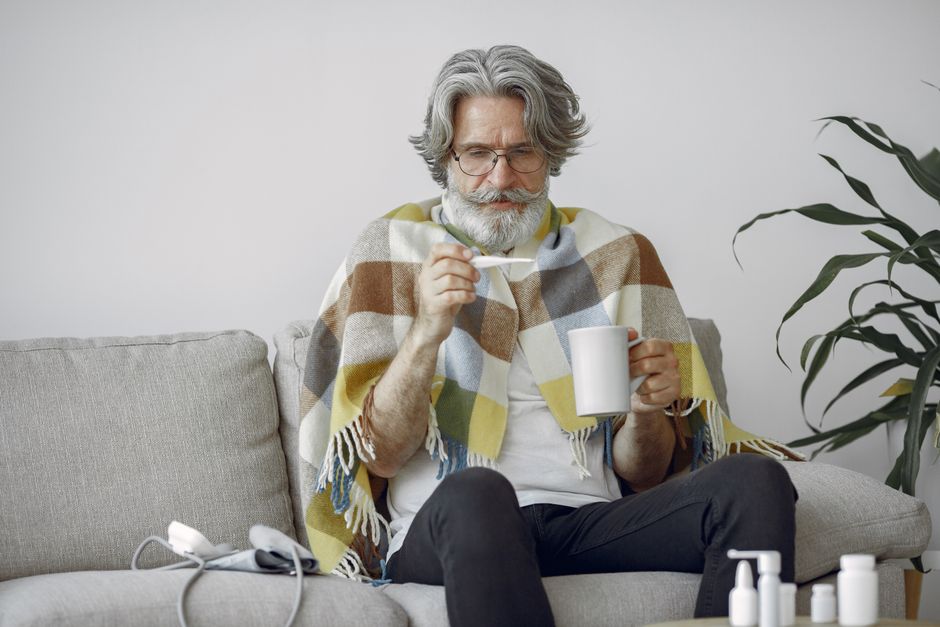
When a cold or flu strikes, recovery often happens at home with rest, fluids, and over-the-counter medicines that ease specific symptoms. Understanding which active ingredients treat which symptoms—and what cautions apply to adults over 50—can help you feel better while staying safe.
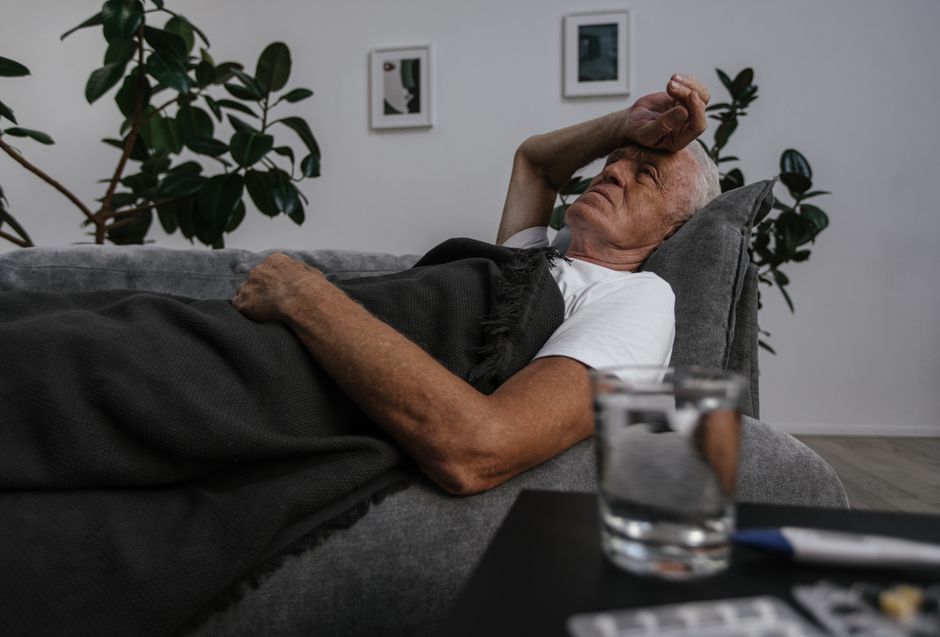
Why Rest Matters During Recovery
Rest gives your body the energy it needs to fight off the virus. When you sleep or relax quietly, your immune system can focus on producing the cells and proteins that battle infection.
Pushing through illness and staying busy may prolong your symptoms or make you feel worse. Light activity around the house is usually fine if you feel up to it, but now is the time to let chores wait and accept help from family or friends.
Resting also reduces your risk of spreading the virus to others. Staying home while you are contagious protects those around you.
The Role of Fluids in Recovery
Drinking enough fluids helps your body in several important ways. Staying hydrated keeps mucus thinner and easier to clear from your nose and chest. It also supports your immune system and helps regulate body temperature when you have a fever.
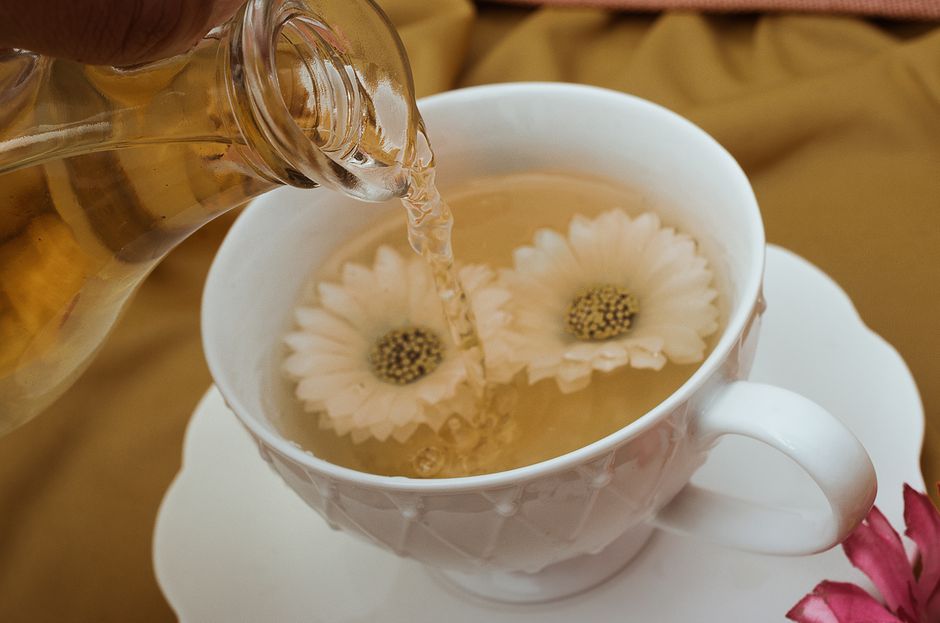
Water is a good choice. Warm liquids like broth, herbal tea, or warm water with lemon can soothe a sore throat and feel comforting. Some people find that warm drinks also help loosen mucus.
Drinks with caffeine or alcohol may contribute to dehydration. The amount of fluid you need varies based on your body size, activity level, fever, and how much you are sweating or losing through mucus, so let your thirst guide you and sip throughout the day.
Understanding Over-the-Counter Medicines for Symptom Relief
Over-the-counter medicines do not cure a cold or flu, but they can ease uncomfortable symptoms while your body recovers. Each active ingredient targets specific problems, so reading labels carefully helps you choose what you actually need.
Many products combine multiple ingredients to treat several symptoms at once. These combination products can be convenient, but they also raise the risk of taking too much of one ingredient if you are not careful.
For Runny Nose and Sneezing: First-Generation Antihistamines
First-generation antihistamines like diphenhydramine and chlorpheniramine can dry up a runny nose and reduce sneezing. These medicines work by blocking histamine, a chemical your body releases during an immune response.
Important safety caution for older adults: These first-generation antihistamines cause drowsiness and can also increase the risk of falls, confusion, and dizziness in people over 50. They may affect balance and coordination even if you do not feel especially sleepy.
If you choose to use these medicines, avoid driving or operating machinery, and be extra careful moving around your home, especially at night. Do not combine them with alcohol or other medicines that cause drowsiness without asking a pharmacist first.
For Stuffy Nose: Pseudoephedrine
Pseudoephedrine is a decongestant that shrinks swollen blood vessels in your nasal passages, making it easier to breathe through your nose. It works differently than antihistamines and does not usually cause drowsiness.
You will find pseudoephedrine behind the pharmacy counter. You do not need a prescription, but you will need to ask the pharmacist and show identification due to federal purchasing limits.
Note: Many cold medicines sold on open store shelves contain oral phenylephrine instead. In 2023, an FDA advisory committee concluded that oral phenylephrine does not work to relieve nasal congestion, so check the active ingredients on the label.
Important safety caution: Pseudoephedrine can raise blood pressure and heart rate. If you have high blood pressure, heart disease, or certain other conditions, talk with your doctor or pharmacist before using this medicine. It can also cause jitteriness or make it hard to sleep, especially if taken late in the day.
For Dry Cough: Dextromethorphan
A dry cough that does not bring up mucus can be irritating and interfere with rest. Dextromethorphan is a cough suppressant that works in the brain to reduce the urge to cough.
This ingredient can help you sleep better at night when coughing keeps you awake. Follow the label directions and ask a pharmacist if you take other medicines, as dextromethorphan can interact with certain prescription drugs.
For Chest Congestion: Guaifenesin
Guaifenesin is an expectorant that helps thin mucus in your chest, making it easier to cough up. This can be helpful when you have a productive cough that brings up phlegm.
Drinking plenty of fluids while taking guaifenesin may help the medicine work. Remember that coughing up mucus is your body’s way of clearing the infection, so suppressing a productive cough is usually not recommended.
For Fever, Aches, and Sore Throat: Acetaminophen or Ibuprofen
Both acetaminophen and ibuprofen reduce fever and ease body aches, headache, and sore throat pain. They work in different ways, and some people find one more helpful than the other.
Acetaminophen is generally easier on the stomach, but taking too much can harm your liver. Many combination cold and flu products contain acetaminophen, so check every label carefully to make sure you are not taking it twice.
Important safety caution for acetaminophen: Never exceed the maximum daily amount listed on the label. If you drink alcohol regularly, talk with your doctor about safe use of acetaminophen.
Important safety cautions for ibuprofen: This medicine needs caution if you have kidney disease, stomach ulcers, heart disease, or if you take blood thinners. Ibuprofen can irritate the stomach, especially when taken on an empty stomach or for several days in a row. Taking it with food may help reduce stomach upset.
If you are unsure which option is safer for you, ask your pharmacist or doctor.
Reading Labels and Avoiding Doubled-Up Ingredients
Many over-the-counter cold and flu products combine multiple active ingredients in one pill, capsule, or liquid. Before taking any medicine, read the “Active Ingredients” section on the label to see exactly what you are getting.
If you take more than one product—for example, a daytime multi-symptom formula and a separate pain reliever—you may accidentally take the same ingredient twice. This is especially common with acetaminophen, which appears in many combination products.
Taking too much of any ingredient increases your risk of side effects and can be dangerous. When in doubt, ask a pharmacist to review everything you are taking.
Safety First: Ask Your Pharmacist Before Combining Products
Pharmacists are trained to spot potential problems with medicine combinations. Before taking multiple over-the-counter products together, or before adding over-the-counter medicines to your prescription drugs, ask your pharmacist to review your full list.
This is especially important if you have ongoing health conditions like high blood pressure, heart disease, kidney disease, liver disease, diabetes, or stomach problems. Bring a list of all your current medicines, including vitamins and supplements, so the pharmacist can give you accurate advice.
Your pharmacist can also help you choose the simplest, safest option for your specific symptoms rather than a multi-symptom product that includes ingredients you do not need.
Active Ingredient
Symptom It Treats
Key Caution
Diphenhydramine or Chlorpheniramine
Runny nose and sneezing
May cause drowsiness, falls, confusion in adults over 50
Pseudoephedrine
Stuffy nose
Can raise blood pressure and heart rate
Dextromethorphan
Dry cough
Can interact with certain prescription drugs
Guaifenesin
Chest congestion (thins mucus)
Works best with plenty of fluids
Acetaminophen
Fever, aches, sore throat
Can harm liver if you take too much
Ibuprofen
Fever, aches, sore throat
Can irritate stomach; needs caution with kidney or heart disease
Putting It All Together
Recovering from a cold or flu takes time, usually one to two weeks. Rest and fluids form the foundation of home care, while over-the-counter medicines can ease specific symptoms.
Choose medicines based on the symptoms that bother you. Use the lowest amount that provides relief, follow label directions, and watch for side effects, especially if you are trying a medicine for the first time.
Part 5 of this series will explain the warning signs that mean you should seek medical care. If you develop trouble breathing, chest pain, or sudden confusion at any time, call 911 right away.
Being informed about the medicines you take and the cautions that apply to older adults helps you recover safely and comfortably at home.
Disclaimer: This article is for general information only and does not replace professional medical advice. Talk with your doctor or pharmacist before making changes to your health care, and call 911 in an emergency.
Preventing Colds and Flu Vaccines, Hygiene, and Daily Habits That Protect You
While none of us can avoid every cold or flu, smart prevention strategies can lower your risk and help keep your immune system ready to defend you. This third article in our series focuses on what you can do to stay healthy, from getting your annual flu vaccine to simple daily habits that support your body’s natural defenses.
The Flu Vaccine: An Important Defense Against Influenza
Getting vaccinated each year is an important way to help prevent the flu. The Centers for Disease Control and Prevention recommends that everyone six months and older receive an annual flu vaccine, with rare exceptions based on certain allergies or medical conditions.
Why the Flu Vaccine Matters More as We Age
While everyone benefits from flu vaccination, it becomes increasingly important as we get older. Adults aged 65 and older face higher risk of serious complications from the flu, including pneumonia, hospitalization, and even death. The flu vaccine can help reduce these risks.
People with chronic health conditions like heart disease, diabetes, lung disease, or weakened immune systems also face greater danger from the flu and should prioritize getting vaccinated each year. If you live with or care for someone in these groups, your vaccination helps protect them too.
Special Vaccine Options for Older Adults
Adults 65 and older have specific flu vaccine options designed to provide stronger protection. These include high-dose vaccines and vaccines with an added ingredient to boost immune response. Talk with your doctor or pharmacist about which option makes sense for you.
When to Get Your Flu Shot
Timing matters for flu vaccination. Getting vaccinated too early in summer may mean your protection wanes before flu season ends, while waiting too long leaves you vulnerable during early outbreaks.
For many adults, September and October are often good months to get vaccinated. This timing allows your body to build immunity before flu activity typically peaks in winter. However, getting vaccinated later in the season still offers valuable protection, so if you missed the early window, go ahead and get your shot.
What to Expect from the Flu Vaccine
The flu vaccine does not guarantee you will not get the flu, but it can lower your chances. If you do get sick despite vaccination, research suggests your illness may be milder and shorter than it would have been without the vaccine.
Some people experience mild soreness at the injection site or low-grade achiness for a day or two after vaccination. These minor effects are signs your immune system is responding and building protection.
Why There Is No Vaccine for the Common Cold
You might wonder why we have a flu vaccine but not one for the common cold. The answer lies in the nature of these viruses. While a limited number of influenza virus strains circulate each year, allowing scientists to target them with an annual vaccine, the common cold can be caused by hundreds of different virus types. Creating a vaccine that protects against all of them is not currently possible.
This is one more reason the flu vaccine is so valuable—it protects you from a serious illness we can actually prevent.
Handwashing: Simple but Powerful
Proper handwashing can be an effective way to help prevent infection. Many of us learned to wash our hands as children, but doing it correctly takes more attention than a quick rinse.
The Right Technique
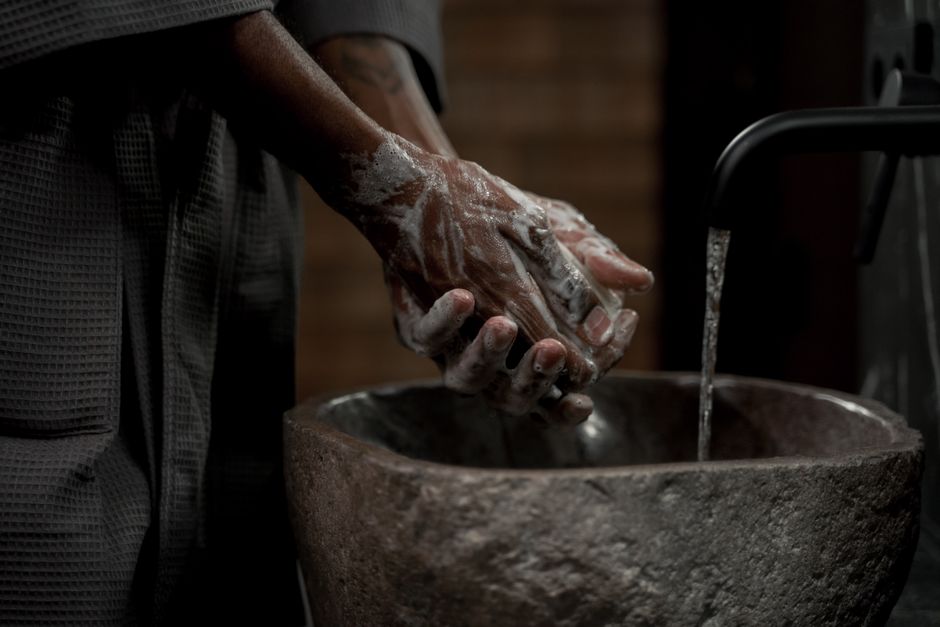
Effective handwashing takes at least 20 seconds. Wet your hands with clean running water, then apply soap. Lather the soap by rubbing your hands together, making sure to scrub the backs of your hands, between your fingers, and under your nails. Continue scrubbing for at least 20 seconds—about the time it takes to hum “Happy Birthday” twice. Rinse thoroughly under running water and dry with a clean towel or air dryer.
When to Wash Your Hands
Make handwashing a habit at key times throughout the day. Always wash before eating or preparing food, after using the bathroom, after blowing your nose or coughing into your hands, and after touching surfaces in public places like shopping carts, door handles, or ATM buttons.
When you come home from errands or social activities, washing your hands before touching your face or handling food helps remove germs you may have picked up.
Hand Sanitizer as a Backup
When soap and water are not available, alcohol-based hand sanitizer with at least 60 percent alcohol content offers a convenient alternative. Apply enough sanitizer to cover all surfaces of your hands, then rub your hands together until they feel dry. However, hand sanitizer does not work as well when hands are visibly dirty or greasy, so washing with soap and water remains the gold standard.
Sleep: Your Immune System’s Recovery Time
The hours you spend sleeping are not idle time for your body. During sleep, your immune system releases proteins and other substances that help fight infection and inflammation. When you cut sleep short, your body produces fewer of these protective substances.
How Much Sleep Do You Need?
Sleep needs vary from person to person and can change with age, but most adults need at least seven hours of sleep each night. Pay attention to how you feel—if you wake feeling rested and maintain energy throughout the day, you are likely getting enough sleep.
Building Better Sleep Habits
Consistency helps. Going to bed and waking up at roughly the same times each day, even on weekends, supports your body’s natural sleep-wake rhythm. Creating a calm bedtime routine, keeping your bedroom cool and dark, and limiting screen time before bed can all improve sleep quality.
If you have trouble sleeping despite good habits, or if you snore loudly or wake feeling unrested, talk with your doctor. Sleep problems sometimes signal health issues that deserve attention.
Nutrition That Supports Immune Health
No single food or supplement prevents colds and flu, but eating well gives your immune system the nutrients it needs to function properly. A balanced eating pattern that includes a variety of foods supports overall health, which in turn helps your body defend against infection.
Focus on Variety and Quality
A diet rich in fruits, vegetables, whole grains, lean proteins, and healthy fats provides vitamins, minerals, and other compounds your immune system uses to protect you. Different colored fruits and vegetables offer different nutrients, so variety matters.
Citrus fruits, berries, leafy greens, bell peppers, nuts, seeds, fish, poultry, beans, and yogurt all contribute nutrients linked to immune function. Rather than focusing on single “superfoods,” aim for a colorful, varied plate at most meals.
Protein Matters
Your immune system relies on protein to build the cells and antibodies that fight infection. Including protein sources at each meal—whether from meat, poultry, fish, eggs, dairy, beans, lentils, nuts, or soy foods—helps ensure your body has what it needs.
As we age, our bodies may use protein less efficiently, making adequate protein intake even more important. If you are not sure you are getting enough protein, a conversation with your doctor or a registered dietitian can help.
Stay Hydrated
Fluids support every system in your body, including your immune defenses. Water, tea, milk, soup, and water-rich foods like fruits and vegetables all contribute to hydration. Your needs vary based on your activity level, climate, and individual factors, so drink when you are thirsty and pay attention to the color of your urine—pale yellow generally indicates good hydration.
What About Supplements?
While advertisements often promote vitamins and supplements as immune boosters, research does not consistently show that taking extra vitamins prevents colds or flu in people who are already eating reasonably well. Some supplements can interact with medications or cause side effects at high doses.
If you are concerned about getting adequate nutrition, talk with your doctor before starting supplements. A blood test can identify actual deficiencies that may need addressing.
Other Daily Habits That Help
Beyond vaccines, handwashing, sleep, and nutrition, several other habits contribute to staying healthy during cold and flu season.
Avoid Touching Your Face
Your eyes, nose, and mouth provide entry points for viruses. Making a conscious effort to keep your hands away from your face throughout the day reduces the chance of transferring germs from surfaces to these vulnerable areas.
Keep Your Environment Clean
Regularly cleaning frequently touched surfaces in your home—like doorknobs, light switches, remote controls, and phone screens—removes germs that could cause infection. Regular household cleaners work well for this purpose.
Manage Stress
While occasional stress is part of life, chronic stress can affect immune function. Finding healthy ways to manage stress—whether through physical activity, hobbies, social connection, meditation, or other relaxation practices—supports your overall health.
Stay Active
Regular physical activity contributes to general good health and may help immune function. Many adults benefit from moving their body most days of the week. Walking, swimming, dancing, gardening, or any activity you enjoy all count.
Before starting a new exercise routine, especially if you have been inactive or have chronic health conditions, check with your doctor to make sure your plan is safe for you.
Do Not Smoke
Smoking damages the respiratory system and weakens the body’s defenses against infection. If you smoke, quitting is one of the most powerful steps you can take to protect your health. Your doctor can help you find support and strategies that work.
Consider Those Around You
Prevention also means protecting others. If you do get sick, staying home when possible, covering coughs and sneezes with a tissue or your elbow, and washing your hands frequently helps keep viruses from spreading to family, friends, and community members. (Part 4 of this series covers recovery at home.)
Group
Vaccine Recommendation
Why It Matters
Everyone 6 months and older
Annual flu vaccine
Helps prevent flu and reduce severity if you get sick
Adults 65 and older
Annual flu vaccine (high-dose or adjuvanted options available)
Higher risk of serious complications like pneumonia and hospitalization
People with chronic conditions (heart disease, diabetes, lung disease, weakened immune)
Annual flu vaccine
Face greater danger from flu complications
Prevention Is Not Perfection
Even with all these strategies in place, you may still catch a cold or flu from time to time. That is normal. Prevention reduces your risk but does not eliminate it entirely. What these habits do accomplish is lowering your chances of getting sick and helping your body respond more effectively if you do pick up an infection.
The good news is that prevention strategies—eating well, sleeping enough, staying active, washing your hands, and getting vaccinated—also support your health in broader ways. These are not just tactics for cold and flu season but foundations for feeling your best year-round.
Making prevention part of your routine takes some attention at first, but these habits can become second nature with practice. Start where you are, choose one or two strategies to focus on, and build from there. Your immune system will thank you.
Disclaimer: This article is for general information only and does not replace professional medical advice. Talk with your doctor or pharmacist before making changes to your health care, and call 911 in an emergency.
Cold and Flu Symptoms What to Expect and Who Faces Higher Risk of Complications
Understanding what to expect when cold or flu symptoms appear can help you gauge how you’re doing and recognize when something more serious might be developing. Both illnesses share some features, but they follow different patterns and carry different levels of risk, especially for older adults and those with chronic health conditions.
Common Cold Symptoms and Their Typical Pattern
The common cold usually announces itself gradually. You might first notice a scratchy or sore throat, often followed by sneezing and a runny or stuffy nose. These early symptoms typically develop over a day or two rather than hitting all at once.
As a cold progresses, nasal congestion often becomes the main complaint. Your nose may feel blocked, and you might produce clear or slightly cloudy mucus. Sneezing fits are common, especially in the first few days.
Many people with colds develop a mild cough as mucus drips down the back of the throat. This postnasal drip can make your throat feel irritated or ticklish. Some people feel tired or have a general sense of being under the weather, but severe exhaustion is uncommon with colds.
Body aches can occur with a cold, but they’re usually mild if present at all. Fever is rare in adults with colds, though children sometimes run a low-grade fever. Cold symptoms often remain centered above the neck—in your nose, throat, and head.
Influenza Symptoms and How They Differ from Cold Symptoms
Influenza, commonly called the flu, typically strikes suddenly and feels much more severe than a cold. Many people can pinpoint the hour when flu symptoms began because the onset is so abrupt.
Fever is a common sign of influenza in adults, though not everyone with the flu will have a fever. When fever does occur, the temperature often rises quickly and may reach higher levels than you’d see with a cold. Along with fever, you may experience chills, sometimes severe enough that you need extra blankets even in a warm room.
Body aches are another distinguishing feature of the flu. These aren’t mild twinges—they’re often significant muscle aches that make your whole body feel sore, as though you’ve had an intense workout. Your muscles might hurt even when you’re lying still.
Severe fatigue sets in early with influenza. This isn’t just feeling a bit tired; it’s an exhaustion that makes even simple tasks feel overwhelming. Getting out of bed to walk to the bathroom can feel like a major effort.
Headaches are common with the flu and can be quite intense. You may also develop a dry cough early in the illness. While the flu can cause nasal symptoms like congestion and sneezing, these respiratory symptoms often feel secondary to the fever, aches, and exhaustion.
The flu makes many people feel truly miserable in a way that a cold typically doesn’t. If you’re debating whether you have a cold or the flu, ask yourself how suddenly it started and how sick you feel overall. A sudden onset with fever and severe body aches points toward influenza.
Typical Duration of Cold Illness
Colds often last about seven to ten days, though some symptoms may linger a bit longer. The timeline varies from person to person, and some colds resolve faster while others hang on.
The first two to three days usually bring the worst symptoms, with peak congestion, sneezing, and throat discomfort. After this initial phase, symptoms generally begin to improve gradually.
Nasal congestion and cough often persist the longest. You might find that your runny nose has cleared up but you’re still coughing two weeks after the cold began. This lingering cough happens because your airways remain slightly irritated even after the virus itself is gone.
If cold symptoms last much longer than two weeks without improvement, or if they seem to get better and then suddenly worsen, something else may be going on. We’ll discuss when to seek medical care in Part 5 of this series.
Typical Duration of Flu Illness
The acute phase of influenza usually lasts about three to seven days. Fever typically breaks within three to five days for many people, though it can persist longer in some cases.
Even after your fever resolves, fatigue often lingers. Many people feel weak and tired for a week or two after the worst flu symptoms have passed. This extended recovery period is normal with influenza and shouldn’t alarm you, though it can be frustrating.
Your cough may also continue for two weeks or more after other flu symptoms improve. Like the post-cold cough, this happens because your respiratory tract needs time to heal fully.
The prolonged fatigue and recovery time distinguish the flu from a cold. While you might bounce back to normal activities within a few days of a cold starting to improve, the flu often requires more patience as your strength gradually returns.
Why Adults 65 and Older Face Higher Complication Risk
Age brings wisdom and experience, but it also brings changes to the immune system that can make fighting off infections more challenging. The immune system naturally becomes less robust with age, responding more slowly and less vigorously to viruses.
Older adults also experience changes in lung function over time. The airways and lung tissue become less elastic, and the muscles used for breathing may weaken somewhat. These changes mean that respiratory infections can more easily progress to affect the lungs.
When older adults develop influenza, they face higher risks of serious complications including pneumonia, bronchitis, and worsening of existing health conditions. The flu can trigger a chain of events that leads to hospitalization and, in some cases, life-threatening illness.
The risk increases notably starting at age 65, which is why public health guidance emphasizes flu prevention for this age group. The combination of immune changes and decreased lung reserve creates vulnerability that wasn’t present in younger years.
Increased Risk for People with Chronic Conditions
Certain chronic health conditions can increase the risk of serious complications from both colds and especially from influenza, regardless of your age. If you manage one or more of these conditions, respiratory infections deserve extra attention.
Heart Disease
Heart disease can make flu complications more likely because the infection puts additional stress on your cardiovascular system. When you have the flu, your heart works harder to pump blood while your body fights the virus and manages fever.
Influenza can trigger heart-related complications including heart attacks and worsening heart failure. The inflammation that occurs during flu illness can affect the heart directly, and the physical stress of being sick increases demands on an already compromised cardiovascular system.
Even severe colds can strain the heart, though the flu poses the greater danger. If you have any form of heart disease—including coronary artery disease, heart failure, or a history of heart attack—take respiratory infections seriously.
Diabetes
Diabetes can complicate flu recovery in several ways. When you’re sick with any infection, your blood sugar levels often become harder to control. Stress hormones released during illness can raise blood sugar even if you’re eating less than usual.
Dehydration, which can occur with fever, also affects blood sugar management. High blood sugar, in turn, can impair immune function, making it harder for your body to fight off the infection effectively.
People with diabetes face increased risk of pneumonia and other flu complications. The combination of altered immune response and the challenge of maintaining good blood sugar control during illness creates additional vulnerability.
Asthma
For people with asthma, respiratory infections are a common trigger for asthma attacks and worsening symptoms. Both colds and flu can inflame airways that are already sensitive, leading to increased wheezing, coughing, and shortness of breath.
The flu poses particular risks for people with asthma. The infection can cause severe asthma exacerbations requiring urgent medical care and sometimes hospitalization. Airways that are already prone to inflammation and narrowing react more strongly to the viral infection.
Even common colds can trigger problematic asthma symptoms that last well beyond the cold itself. The combination of viral infection and underlying airway sensitivity means respiratory illnesses often hit harder and last longer when asthma is part of the picture.
Chronic Lung Disease
Chronic obstructive pulmonary disease (COPD), emphysema, chronic bronchitis, and other long-term lung conditions create vulnerability to respiratory infections. When you’re already working with reduced lung function, adding a viral infection on top can quickly become serious.
The flu can cause severe worsening of chronic lung disease, leading to difficulty breathing that requires medical intervention. Pneumonia develops more easily in people whose lungs are already compromised, and recovery takes longer.
These conditions put you at higher risk for complications that could require hospitalization. Respiratory infections should be taken seriously if you manage chronic lung disease.
Other Chronic Conditions
Other conditions that can increase complication risk include chronic kidney disease, liver disease, weakened immune systems from any cause, and obesity. Each of these conditions affects your body’s ability to fight infection or increases the physical stress that illness places on your system.
If you manage any chronic health condition, consider yourself at higher risk for complications from influenza. This doesn’t mean you’ll definitely develop complications, but it does mean extra vigilance makes sense.
Pregnancy as a Risk Factor for Complications
Pregnancy brings changes to the immune system and to how the heart and lungs function. These normal adaptations that support a growing baby also create increased vulnerability to flu complications.
The risk extends through the first two weeks after delivery, when the body is still adjusting back to its non-pregnant state. Anyone who is pregnant or recently delivered should be aware that the flu poses greater risks during this time.
Changes in lung capacity and immune function during pregnancy mean that respiratory infections can hit harder. This increased vulnerability is one reason flu vaccination is often recommended during pregnancy, as we’ll discuss in Part 3 of this series.
Symptom
Common Cold
Influenza (Flu)
Onset
Gradual, over a day or two
Sudden, can pinpoint the hour
Fever
Rare in adults
Common, often high
Body aches
Mild if present at all
Severe, whole body feels sore
Fatigue
Mild tiredness
Severe exhaustion, overwhelming
Main symptoms
Nasal congestion, sneezing, sore throat
Fever, chills, body aches, headache
Knowing Your Own Risk Profile
Take a moment to consider your personal situation. Are you 65 or older? Do you manage diabetes, heart disease, asthma, or another chronic condition? Understanding your risk level helps you take respiratory infections as seriously as you should.
Being at higher risk doesn’t mean you should panic at every sniffle, but it does mean paying attention when cold or flu symptoms develop. Knowing what’s normal for these illnesses and what might signal complications helps you make informed decisions about your care.
The good news is that being aware of your risk allows you to take protective steps and seek care promptly if needed. Prevention strategies can be effective for people in higher-risk groups, as we’ll explore in Part 3. And knowing when symptoms warrant medical attention, which we’ll cover in Part 5, helps you get timely care if complications do develop.
Cold and flu season comes every year, but understanding your symptoms and your personal risk level puts you in a stronger position to weather it safely.
Disclaimer: This article is for general information only and does not replace professional medical advice. Talk with your doctor or pharmacist before making changes to your health care, and call 911 in an emergency.
Cold vs. Flu Understanding the Difference Between Two Common Viral Infections
When you wake up with a stuffy nose or feel under the weather, you might wonder whether you have a cold or the flu. While both illnesses can make you feel miserable, they are caused by different viruses and affect your body in different ways. Understanding these differences can help you know what to expect and how to respond.
This is Part 1 of our five-part series on colds and flu. Today, we’ll explore what these viral infections are, how they spread, and why they seem to arrive like clockwork each fall and winter.
What Is the Common Cold?
The common cold is a viral infection of your upper respiratory tract, which includes your nose and throat. Despite its name, the common cold is not caused by just one virus. More than two hundred different viruses can cause cold symptoms, though rhinoviruses are responsible for many colds in adults.
Other viruses that can cause colds include coronaviruses (not the type that causes COVID-19, but other common types), adenoviruses, and parainfluenza viruses. Because so many different viruses can cause colds, it’s possible to catch multiple colds throughout a single season.
Colds are generally mild infections that affect the upper parts of your respiratory system. Your body typically fights off a cold virus on its own within a week or two, though some symptoms may linger a bit longer.
What Is Influenza (the Flu)?
Influenza, commonly called the flu, is a respiratory infection caused by influenza viruses. Unlike the hundreds of viruses that can cause colds, only influenza A and influenza B viruses cause seasonal flu epidemics in people.
These flu viruses change slightly from year to year, which is why different strains circulate each season. Influenza A viruses are further divided into subtypes based on proteins on their surface, while influenza B viruses are divided into lineages. Both types can make you quite ill.
The flu affects your entire respiratory system, including your nose, throat, and lungs. It tends to come on more suddenly than a cold and typically makes people feel more severely ill overall. We’ll discuss the specific symptoms and how they compare in Part 2 of this series.
Key Differences Between Cold and Flu Viruses
While both colds and flu are respiratory viral infections, the viruses themselves behave differently in your body. Cold viruses primarily settle in your nose and throat, causing upper respiratory symptoms. They multiply in the cells lining your nasal passages and throat.
Flu viruses can infect your entire respiratory tract, reaching deeper into your lungs. They replicate more aggressively than cold viruses and trigger a stronger response from your immune system. This more intense infection and immune response is part of why the flu typically makes people feel sicker than a cold does.
Another difference is how quickly these illnesses develop. Cold symptoms usually build gradually over a day or two, while flu symptoms tend to hit suddenly and feel more intense from the start.
The potential for complications also differs between these infections. While anyone can become seriously ill from either a cold or the flu, influenza may carry a higher risk of complications that may require medical care. Part 2 of this series will explain who faces higher risks.
How Cold and Flu Viruses Spread
Both cold and flu viruses spread from person to person in similar ways. Understanding how these viruses move through communities can help you make sense of why these illnesses are so common.
Respiratory Droplets
One primary way both viruses spread is through respiratory droplets. When someone with a cold or flu coughs, sneezes, or talks, they release tiny droplets containing the virus into the air. If you are nearby and breathe in these droplets, or if they land in your mouth or nose, you can become infected.
Larger droplets tend to fall to the ground or nearby surfaces fairly quickly, while smaller particles can stay in the air longer, especially in crowded or poorly ventilated rooms. This is why close contact with someone who is sick increases your risk of catching their illness.
Contaminated Surfaces
Cold and flu viruses can survive on surfaces for a period of time. When someone who is infected touches their nose or mouth and then touches a doorknob, light switch, phone, or other object, they can leave viruses behind.
If you touch that contaminated surface and then touch your own face, particularly your nose, mouth, or eyes, the virus can enter your body and cause an infection. This indirect contact is a common way these viruses spread, especially in households, workplaces, and public spaces.
How long viruses stay infectious on surfaces depends on the type of virus, the surface material, and conditions like temperature and humidity. Regular handwashing and cleaning frequently touched surfaces can help lower the risk.
Close Contact and Shared Spaces
Living with someone who has a cold or flu significantly increases your chances of getting sick. Families often pass these viruses back and forth, especially when young children bring infections home from school or daycare and share them with adults in the household.
Crowded indoor spaces where people gather closely together create favorable conditions for respiratory viruses to spread. Offices, public transportation, shopping centers, and community events all provide opportunities for viruses to move from person to person.
People with colds or flu can spread the virus to others even before they realize they’re sick. You may be contagious starting a day or so before you develop symptoms and for several days after symptoms begin. This means someone who seems perfectly healthy might unknowingly pass the virus to you.
Why Colds and Flu Peak in Fall and Winter
You’ve probably noticed that colds and flu are much more common during the cooler months. In the United States, cold season typically runs from fall through spring, while flu season usually peaks between December and February, though it can extend from October into May.
Several factors contribute to this seasonal pattern.
Indoor Gatherings
During cold weather, people spend more time indoors in closer contact with each other. Windows stay closed, and indoor air circulates without as much fresh air from outside. This creates more opportunities for respiratory viruses to spread from person to person in homes, schools, workplaces, and other indoor spaces.
Holiday gatherings and indoor events during fall and winter also bring people together in ways that facilitate virus transmission. When many people share enclosed spaces for extended periods, viruses can spread more easily through the group.
Environmental Conditions
Cold, dry air affects both the viruses themselves and your body’s defenses against them. Some research suggests that certain respiratory viruses may survive longer and spread more easily in cold, dry conditions. Low humidity may allow virus-containing droplets to remain suspended in the air longer.
Dry indoor air during winter can also dry out the mucous membranes in your nose and throat. These membranes are part of your body’s first line of defense against respiratory infections, and when they’re dry and irritated, they may be less effective at trapping and clearing viruses.
Less Sunlight and Vitamin D
Shorter days and less time outdoors during winter mean less exposure to sunlight. Sunlight helps your body produce vitamin D, which plays a role in immune system function. While the relationship is complex and not fully understood, some researchers believe that lower vitamin D levels during winter months may contribute to increased susceptibility to respiratory infections.
Back-to-School Effect
The start of the school year in fall brings children together in classrooms after summer break. Schools are efficient places for respiratory viruses to spread among children, who then bring infections home to family members. This helps trigger the annual cycle of increased cold and flu activity.
Feature
Common Cold
Influenza (Flu)
Caused by
More than 200 different viruses (mainly rhinoviruses)
Influenza A and B viruses
Location in body
Upper respiratory tract (nose and throat)
Entire respiratory tract (nose, throat, and lungs)
How symptoms start
Build gradually over a day or two
Hit suddenly and feel intense from the start
Severity
Generally mild
Typically makes people feel more severely ill
Complications risk
Lower
Higher risk of complications requiring medical care
Looking Ahead in This Series
Now that you understand what colds and flu are and how they spread, you’re ready to learn more about recognizing these infections and protecting yourself. Part 2 will help you understand the symptoms of colds and flu, how they differ, and who faces higher risks of complications.
Part 3 will cover prevention strategies, including the role of flu vaccines and daily habits that can reduce your risk. Part 4 will explain how to care for yourself at home when you do get sick, and Part 5 will help you recognize when symptoms require medical attention.
Both colds and flu are part of life, especially as we age. While we can’t avoid viruses entirely, understanding these common infections helps you respond appropriately and take steps to protect your health throughout the year.
Disclaimer: This article is for general information only and does not replace professional medical advice. Talk with your doctor or pharmacist before making changes to your health care, and call 911 in an emergency.
Swimming, Cycling, or Elliptical Which Low-Impact Cardio Burns the Most Calories and Protects Your Joints
If running feels harder on your knees than it used to, you’re not imagining things. Many adults over 50 find that high-impact activities don’t work as well as they once did. The good news is that low-impact cardio can give you an excellent workout while being gentler on your joints.
Swimming, cycling, and elliptical training are three popular low-impact options. Each offers different benefits, challenges, and calorie-burning potential. Let’s compare them so you can choose the fit for your lifestyle and fitness goals.
Understanding Low-Impact Exercise
Low-impact doesn’t mean low-intensity. These exercises keep at least one foot (or your whole body) in contact with a surface at all times, reducing the force on your joints compared to activities like running or jumping. You can still work hard enough to breathe heavily and break a sweat.
The key difference is what happens to your joints. High-impact activities can put force on your knees equal to several times your body weight with each step. Low-impact cardio spreads that force more evenly or eliminates the pounding altogether.
Calorie Burn Comparison
How many calories you burn depends on your weight, how hard you work, and how long you exercise. In general terms, all three activities can burn similar amounts of calories when you work at a similar effort level.
Swimming tends to burn calories efficiently because it uses your entire body. The water provides resistance in all directions, making your muscles work harder. A moderate-pace swim typically burns calories at a rate similar to brisk walking or leisurely cycling, while vigorous swimming can match or exceed the calorie burn of faster cycling.
Cycling calorie burn varies significantly with speed and resistance. A casual ride on flat terrain burns fewer calories than a moderate swim, but pushing hard on hills or increasing resistance can make cycling one of the higher calorie burners among these three options.
Elliptical machines fall somewhere in the middle. Many people burn calories at a rate comparable to moderate cycling or swimming. The advantage is that you can easily adjust resistance and incline to increase or decrease intensity, giving you control over your calorie burn.
The most important factor isn’t which activity burns slightly more calories—it’s which one you’ll actually do consistently. An exercise you enjoy and stick with will always burn more calories over time than the theoretically “better” option you avoid.
Joint Impact and Safety Profile
Swimming
Swimming is often considered a very joint-friendly exercise. The water supports about 90 percent of your body weight, eliminating the impact that occurs when your feet hit the ground. This makes swimming particularly appealing if you have arthritis, previous joint injuries, or significant extra weight.
The buoyancy of water also reduces your risk of falling, which can be a concern for some older adults trying other forms of exercise. The water provides natural resistance without requiring you to lift weights or adjust machine settings.
One consideration is that swimming requires you to already be comfortable in water and able to swim with reasonable form. Poor technique, especially with certain strokes, can sometimes strain your neck or shoulders.
Cycling
Whether you ride outdoors or use a stationary bike, cycling keeps your body weight supported by the seat. This removes the impact from your knees, hips, and ankles. Your joints move through a smooth, circular motion without the jarring that comes from striking the ground.
Cycling is generally considered safe for people with knee osteoarthritis and other joint concerns. The motion can help lubricate joints and maintain range of motion. Some people find that cycling strengthens the muscles around their knees, which can provide better support.
The main safety concerns with cycling are outdoor hazards like traffic, uneven surfaces, and the risk of falls. Indoor stationary bikes eliminate these risks. Proper bike fit is important—an incorrectly adjusted seat height can strain your knees or hips over time.
Elliptical
Elliptical machines create a smooth, gliding motion that eliminates the impact of running while mimicking a similar movement pattern. Your feet never leave the pedals, so there’s no jarring when you land.
Most elliptical machines also include moving handlebars, letting you involve your upper body for a more complete workout. This can increase calorie burn and make the exercise feel more balanced.
The fixed motion pattern is both a benefit and a limitation. It’s predictable and safe, but your joints move through the same path every time. Some people find this repetitive motion less comfortable than the varied movements of swimming or the freedom of outdoor cycling.
Accessibility, Cost, and Convenience
Swimming
Access to swimming depends heavily on where you live. You’ll need access to a pool, which might mean joining a gym, community center, or municipal pool. Pool memberships or day passes add ongoing costs.
Pool hours can be limited, and you’ll need to factor in time for changing, showering, and dealing with wet hair and swimsuits. Lap swimming times may be restricted to certain hours when lanes are available.
For many people, the biggest barrier is simply discomfort with being in a swimsuit or getting their hair wet during the workday. Others find the ritual of going to the pool relaxing and worth the extra effort.
Cycling
Outdoor cycling requires a bike, which ranges from a modest to significant upfront investment depending on the type and quality you choose. You’ll also need a helmet and may want other safety gear. Once you have the equipment, outdoor cycling is free.
Indoor cycling requires either a stationary bike for your home or access to one at a gym. Basic stationary bikes are more affordable than many other pieces of exercise equipment, though prices vary widely based on features.
The convenience of outdoor cycling depends on your local weather, daylight hours, and whether you have safe places to ride. Indoor cycling can happen any time regardless of conditions, making it more predictable for maintaining a routine.
Elliptical
Elliptical machines are almost exclusively found at gyms or purchased for home use. They’re too large and expensive for most people to buy on a whim, and a quality machine represents a significant investment.
Gym access solves the cost problem but adds membership fees and travel time. You’re also dependent on gym hours and machine availability during busy times.
If you have space and budget for a home elliptical, it offers excellent convenience. You can exercise any time without leaving home, which removes many common barriers to consistency.
Which Option Works Best for Different Fitness Goals
For Weight Management
All three activities can support weight management when done regularly and combined with appropriate eating habits. A good choice is the one that fits your schedule well enough that you’ll do it several times per week.
Swimming and cycling may have a slight edge if you want to exercise for longer periods, as they often feel less tiring to beginners than elliptical training. This can help you gradually build up to longer workout durations.
For Building Cardiovascular Fitness
Each of these exercises can effectively strengthen your heart and lungs. You’ll see improvement by choosing an activity where you can comfortably maintain moderate intensity for sustained periods.
Cycling and elliptical training make it easy to monitor and adjust your intensity with resistance settings and speed displays. Swimming requires more body awareness to gauge your effort level, though you can learn to use your breathing rate and perceived exertion as guides.
For Overall Body Conditioning
Swimming uses many muscle groups simultaneously, engaging your arms, legs, core, and back with every stroke. This makes it a good choice for overall conditioning and functional strength.
Elliptical machines with moving handlebars also work both your upper and lower body, though the arm involvement is generally less intense than in swimming.
Cycling primarily works your lower body. While your core engages to stabilize you and your arms hold the handlebars, cycling doesn’t provide much upper body conditioning. (Part 3 of this series covers strength training options to complement cardio exercise.)
For People with Specific Joint Issues
If you have knee arthritis or previous knee surgery, cycling often works well because the circular pedaling motion is smooth and controlled. The seat supports your weight, and you can start with very light resistance.
For hip problems, swimming may be more comfortable than cycling for some people, as cycling keeps your hips in a bent position. The freedom of movement in water lets your hips move more naturally.
If you have shoulder issues, cycling may be preferable to swimming, especially if certain swimming strokes aggravate your shoulders. Choose an elliptical with stationary handles instead of moving ones if your shoulders are a concern.
Anyone with significant joint problems, recent injuries, or chronic conditions should discuss exercise plans with a doctor or physical therapist before starting a new routine.
How to Get Started with Swimming
If you’re new to swimming or haven’t swum in years, start by simply getting comfortable in the water. Walk back and forth in the shallow end, gradually increasing your pace. This alone provides a good workout.
When you’re ready to swim, begin with whichever stroke feels most natural—often a simple breaststroke or freestyle. Don’t worry about perfect technique at first. Swimming any stroke with reasonable form is better than not swimming at all.
Start with short intervals. Swim one or two pool lengths, rest for a minute, then repeat. Gradually increase the number of repetitions as you build endurance. Even ten minutes of actual swimming time provides benefits when you’re starting out.
Consider a few lessons if you want to improve your technique or learn new strokes. Many community pools and gyms offer adult swimming classes specifically designed for beginners or returning swimmers.
Invest in comfortable goggles that fit well and don’t leak. Being able to see underwater and protect your eyes from chlorine makes swimming much more enjoyable.
How to Get Started with Cycling
If you’re using a stationary bike, adjust the seat height so your knee has a slight bend when the pedal is at its lowest point. Your hips shouldn’t rock side to side as you pedal—if they do, lower the seat slightly.
Begin with just ten or fifteen minutes at an easy pace where you can still hold a conversation. Focus on a smooth, circular pedaling motion rather than pushing hard. Light resistance is fine when you’re starting.
Gradually add a few minutes to your sessions each week. You can increase intensity later by adjusting the resistance, but building duration first helps you develop endurance without overdoing it.
For outdoor cycling, start on flat, quiet routes where you feel safe and can focus on getting comfortable with the bike. Ride during daylight hours and always wear a helmet. Follow traffic laws and use bike lanes when available.
Make sure your outdoor bike fits properly, just like a stationary bike. Many bike shops offer fitting services. An ill-fitting bike can cause knee pain, back discomfort, or numb hands.
How to Get Started with Elliptical Training
Step onto the machine while it’s stationary, using the handrails for support. Start the motion slowly and find your balance before increasing speed. Keep your feet flat on the pedals and your posture upright.
Begin with the resistance set to a low level. The movement should feel smooth and controlled, not like you’re fighting the machine. If you feel wobbly or the motion seems jerky, slow down and reduce resistance.
Start with ten-minute sessions and focus on maintaining good form—shoulders back, core engaged, and weight centered over your feet. Avoid leaning heavily on the handlebars, which reduces the workout intensity and can strain your wrists.
Many elliptical machines can go forward or backward. Once you’re comfortable with forward motion, try reversing direction occasionally to use your muscles differently.
As you build endurance, you can add time, increase resistance, or try preset programs that vary the intensity. But there’s no rush—consistent, comfortable workouts will take you further than pushing too hard too soon.
Combining Different Types of Cardio
You don’t have to choose just one activity. Many people find that mixing swimming, cycling, and elliptical training keeps exercise interesting and works their bodies in different ways.
Variety can also help you maintain consistency when circumstances change. If the pool is closed for maintenance, you can cycle. If the weather is bad for outdoor riding, you can use an elliptical at the gym.
Some people prefer different activities for different goals—perhaps a relaxing swim on recovery days and a more intense cycling session when they want to push harder.
Safety Considerations for All Three Activities
Start any new exercise program gradually, especially if you’ve been inactive. Sudden increases in activity can lead to overuse injuries or excessive soreness that discourages you from continuing.
Stay hydrated before, during, and after exercise. Yes, even swimming—you still sweat in the pool, and the water makes it easy to ignore thirst.
If you experience chest pain, severe shortness of breath, dizziness, or pain that doesn’t improve when you slow down, stop exercising and call 911. These could indicate a serious problem requiring immediate attention.
Anyone with diabetes should be aware that cardio exercise can affect blood sugar levels. Check with your doctor about monitoring your blood sugar before and after exercise, and ask whether you need to adjust medication timing or food intake around workouts.
If you take medications for heart conditions, blood pressure, or other chronic health issues, discuss your exercise plans with your doctor. You may need to adjust medication timing, and your doctor can help you understand what intensity level is appropriate.
Making Your Choice
The low-impact cardio that may work well for you is the one you’ll actually do regularly. Consider these questions:
Which activity sounds most enjoyable to you? Even small preferences matter when you’re trying to build a lasting habit.
Which fits most easily into your daily routine? An exercise that requires minimal travel and preparation is easier to maintain than one that takes significant planning.
Which feels best on your body? If one activity leaves you feeling energized while another causes discomfort, that’s valuable information.
What resources do you already have access to? Starting with what’s readily available often makes more sense than signing up for something that requires new memberships or major purchases.
Do you prefer exercising indoors or outdoors? Some people find outdoor activities more motivating, while others appreciate the climate control and predictability of indoor exercise.
Remember that you can always try one activity and switch if it doesn’t work out. Many gyms offer trial passes, and community pools often sell day passes so you can test swimming before committing to a membership.
Building a Sustainable Routine
Whichever activity you choose, consistency matters more than intensity. Exercising moderately three or four times per week will do more for your health than one exhausting session followed by days of recovery.
Schedule your workouts like appointments. Putting them on your calendar makes them feel more official and helps you plan around them rather than trying to squeeze them in whenever time appears.
Track your progress in whatever way feels motivating—whether that’s minutes exercised, distance covered, or simply checking off days on a calendar. Seeing your consistency build over weeks and months provides powerful encouragement.
Listen to your body and take rest days when you need them. Mild muscle tiredness is normal after exercise, but sharp pain, excessive fatigue, or soreness that persists for days means you should reduce intensity or frequency.
Feature
Swimming
Cycling
Elliptical
Joint Impact
Water supports 90% of body weight, eliminates impact
Body weight supported by seat, no impact
Feet never leave pedals, no impact
Muscles Used
Entire body (arms, legs, core, back)
Primarily lower body
Lower body, plus upper body if using handlebars
Calorie Burn
Moderate pace similar to brisk walking; vigorous can match fast cycling
Varies with speed—casual burns less, hills/resistance burns more
Comparable to moderate cycling or swimming
Access Needed
Pool membership or facility access
Bike (outdoor) or stationary bike/gym
Gym membership or home machine
Best For
Overall conditioning, those with hip problems, avoiding fall risk
Low-impact cardio exercise offers powerful benefits for your heart, joints, weight management, and overall wellbeing. Swimming, cycling, and elliptical training each provide effective workouts while being gentle on your joints.
The activity that’s right for you depends on your individual circumstances, preferences, and goals. You might try all three and discover that one feels like a good fit, or you might enjoy rotating among them for variety.
What matters most is finding a form of movement you can sustain over time. Starting where you are, with what you have, and gradually building from there will serve you better than any attempt to find the single “perfect” exercise.
Your body is capable of more than you might think, and low-impact cardio is a way to discover and expand those capabilities. Whether you’re gliding through water, pedaling down a bike path, or stepping through an elliptical motion, you’re investing in your health and future mobility with every session.
Disclaimer: This article is for general information only and does not replace professional medical advice. Talk with your doctor or pharmacist before making changes to your health care, and call 911 in an emergency.
Exercises to Do If You Sit at a Desk All Day Counteracting the Health Risks of Sedentary Work
If you spend most of your workday sitting, you’re not alone. Many adults over fifty find themselves at desks for hours at a time, whether working from home, in an office, or managing finances and correspondence. While sitting itself isn’t harmful in moderation, spending many hours in a chair day after day can create specific patterns of tightness and weakness that affect how you feel and move.
The good news is that targeted stretches, simple exercises, and smart movement strategies can help address these effects. Let’s look at what prolonged sitting does to your body and how to counteract it with practical movements you can do during your day.
How Prolonged Sitting Affects Your Body
When you sit for extended periods, certain muscles stay shortened while others remain inactive. Your hip flexors, the muscles at the front of your hips, stay in a contracted position hour after hour. Over time, these muscles can become tight and shortened, which can change your posture and make it harder to stand up straight or walk comfortably.
Meanwhile, your hip extensors and glutes, the muscles that help you stand and walk, stay relatively inactive. This can lead to weakness that affects your balance and walking pattern.
Your spine experiences changes too. Many people tend to slouch or round forward while sitting, especially when looking at a computer screen. This position puts your upper back into a rounded curve and your head forward, which strains the muscles and joints of your neck and upper back. The muscles between your shoulder blades become overstretched and weak, while the chest muscles become tight.
The lower back also suffers during prolonged sitting. The natural curve of your lumbar spine can flatten out, which increases pressure on the discs between your vertebrae. Some people develop lower back stiffness or discomfort as a result.
Stretches to Address Desk-Related Tightness
Stretching the areas that become tight from sitting can provide relief and help restore better movement patterns. These stretches are gentle enough to do during your workday.
Hip Flexor Stretch
Stand up and take a large step backward with your right foot, keeping your left foot forward. Lower your hips down and slightly forward until you feel a gentle stretch at the front of your right hip. Keep your torso upright rather than leaning forward. Hold for twenty to thirty seconds, then switch sides.
You can do this stretch while holding onto a desk or countertop for balance. Doing this stretch several times throughout the day can help reduce the tightness that builds up from sitting.
Chest Doorway Stretch
Stand in a doorway and place your forearm against the door frame with your elbow bent at about shoulder height. Step forward slightly with one foot until you feel a gentle stretch across your chest and the front of your shoulder. Hold for twenty to thirty seconds on each side.
This stretch helps open up the chest muscles that become tight when you’re hunched forward at a desk.
Seated Spinal Twist
While sitting in your chair, place your right hand on the outside of your left thigh. Gently rotate your upper body to the left, looking over your left shoulder. Keep your hips facing forward. Hold for fifteen to twenty seconds, breathing normally, then repeat on the other side.
This gentle twist helps maintain mobility in your mid-back and can relieve stiffness from staying in one position.
Neck Side Stretch
Sit or stand with good posture. Gently tilt your head toward your right shoulder, bringing your right ear closer to your shoulder without lifting the shoulder up. You should feel a mild stretch along the left side of your neck. Hold for fifteen to twenty seconds, then repeat on the other side.
Avoid pulling on your head with your hand, which can create too much stretch. Let gravity do the work.
Exercises to Strengthen What Sitting Weakens
Stretching tight areas is only half the solution. You also need to strengthen the muscles that become weak from prolonged sitting.
Glute Squeezes
While sitting in your chair, squeeze your glutes (buttock muscles) together firmly, hold for five seconds, then release. Repeat ten to fifteen times. This simple exercise helps wake up muscles that often “turn off” during long periods of sitting.
You can do this exercise several times throughout your workday without anyone noticing.
Seated Marching
Sit up tall in your chair with your feet flat on the floor. Lift your right knee up a few inches, hold for two seconds, then lower it. Repeat with your left knee. Continue alternating for twenty to thirty repetitions total.
This exercise engages your hip flexors and core muscles in a more active way than sitting still.
Upper Back Strengthener
Sit or stand with your arms at your sides. Squeeze your shoulder blades together gently, as if you’re trying to hold a pencil between them. Hold for five seconds, then release. Repeat ten to fifteen times.
Make sure you’re squeezing your shoulder blades back rather than just lifting your shoulders up toward your ears. This movement strengthens the muscles between your shoulder blades that become weak from slouching.
Chin Tucks
Sit up straight and look forward. Without tilting your head up or down, gently draw your chin straight back, creating a “double chin” appearance. You should feel a gentle stretch at the base of your skull. Hold for five seconds, then relax. Repeat ten times.
This exercise helps counteract the forward head position that strains your neck during computer work.
Movement Breaks and Micro-Workouts During the Workday
Taking regular breaks from sitting is important. Research suggests that breaking up long periods of sitting with brief movement can have health benefits.
The Two-Minute Stand and Stretch
Set a reminder to stand up every thirty to sixty minutes. When the reminder goes off, stand up and do some simple movements for two minutes. Walk around your workspace, do a few arm circles, or perform one or two of the stretches mentioned earlier.
Even this brief interruption to sitting can help reduce stiffness and keep your circulation moving.
Standing Phone Calls
Make it a habit to stand up whenever you take a phone call. If the conversation is longer, walk around while you talk. This simple strategy can add significant standing and walking time to your day without requiring extra effort.
Desk Push-Ups
Stand facing your desk at arm’s length. Place your hands on the edge of the desk about shoulder-width apart. Step your feet back so your body forms a straight line. Lower your chest toward the desk by bending your elbows, then push back up. Do five to ten repetitions.
This movement strengthens your chest, shoulders, and arms while also engaging your core muscles. Make sure your desk is stable and won’t slide before doing this exercise.
Calf Raises at Your Desk
While standing, rise up onto your toes, hold for two seconds, then lower back down. Repeat fifteen to twenty times. You can hold onto your desk for balance if needed.
This simple exercise keeps your calf muscles active and promotes circulation in your lower legs, which can reduce the feeling of heavy or tired legs after sitting.
Stair Opportunities
If you have access to stairs, use them for brief movement breaks. Climbing one or two flights of stairs provides a quick burst of activity that gets your heart rate up and engages your leg muscles. Going up and down stairs a few times during the day adds meaningful movement without requiring a formal workout.
Targeting Problem Areas: Hip Flexors, Upper Back, and Neck
These three areas deserve special attention because they’re often affected by desk work.
Hip Flexor Release and Strengthen
Your hip flexors need both stretching and strengthening, but in different positions. The standing hip flexor stretch described earlier addresses tightness. To strengthen your hip flexors in a lengthened position, try standing leg raises.
Stand next to a wall or sturdy surface for balance. Keeping your standing leg straight, lift your other leg forward with your knee straight, raising it to a comfortable height. Lower it back down with control. Do ten to twelve repetitions on each leg.
This exercise strengthens your hip flexors while your hip is extended rather than flexed, which helps create better balance in these muscles.
Upper Back Mobility Exercise
Sit in a chair with your hands clasped behind your head. Keep your elbows wide. Gently arch your upper back, lifting your chest toward the ceiling and bringing your elbows back. Hold for three to five seconds, then return to a neutral position. Repeat eight to ten times.
This movement helps restore the natural curve of your upper back and counteracts the rounded-forward position of desk work.
Neck Strengthening
Many people stretch their necks but never strengthen them. To gently strengthen your neck muscles, place your hand against your forehead and press your head forward into your hand while your hand resists, preventing your head from actually moving. Hold for five seconds, then relax.
Repeat this isometric exercise with your hand on the back of your head (pressing backward), then on each side of your head (pressing sideways). This builds strength in all the neck muscles without actually moving your neck through a range of motion.
If you have neck pain, dizziness, or a history of neck problems, check with your doctor or physical therapist before doing neck strengthening exercises.
Strategies to Increase Daily Movement Beyond Formal Exercise
While specific exercises help, increasing your overall daily movement has health benefits too. Small changes in your routine can add up to increases in activity.
Walking Meetings and Catch-Ups
If you have informal meetings or phone conversations with colleagues, suggest taking them as walking meetings. Even walking slowly provides movement that’s far better than sitting.
For in-person meetings, arriving a few minutes early gives you time for a brief walk before sitting down.
The Long Route
Choose parking spots farther from entrances. Take the long way to the restroom or break room. If you work from home, take a lap around your house or yard between tasks. These extra steps accumulate throughout the day.
Active Waiting
When you’re waiting for something to print, for a file to load, or for water to boil, use those moments for movement. Do a few calf raises, march in place, or do some arm circles. These brief bursts of activity add up.
Post-Meal Walks
Taking a short walk after meals, even just five to ten minutes, helps with digestion and breaks up sitting time. If you eat lunch at your desk, make it a priority to take a brief walk afterward before settling back into work.
Standing While You Can
Look for opportunities to stand while doing tasks that don’t require sitting. You might stand while reading documents, making phone calls, or having casual conversations. Some people keep a high counter or shelf where they can place a laptop for occasional standing computer work.
You don’t need an expensive standing desk to add more standing to your day. Simply moving to a higher surface for some tasks can help.
Evening Movement Habits
After a day of sitting at work, make movement part of your evening routine. Taking a walk before or after dinner, doing some stretching while watching television, or playing actively with grandchildren all help counteract the day’s sitting.
Part 1 of this series covers how to create a home workout routine with simple equipment if you want more structured evening exercise.
Creating Your Anti-Sitting Routine
The key to counteracting prolonged sitting is consistency rather than intensity. You don’t need to do all these exercises every day. Instead, choose a few that address your particular areas of tightness or discomfort and build them into your daily routine.
A practical approach might include doing two or three stretches during your morning break, taking brief standing breaks every hour, doing a few strengthening exercises at lunch, and taking a short walk in the afternoon. Find a pattern that fits your workday and feels sustainable.
If you have diabetes, take blood pressure medication, or have a condition that affects your balance, talk with your doctor before starting any new exercise routine. Some people may experience dizziness when standing up quickly after sitting for long periods, especially when first increasing their movement.
Listen to your body as you add these movements. You should feel a gentle stretch or mild muscle fatigue, not sharp pain. If any exercise causes pain, skip it and try a different one. Working with a physical therapist can be helpful if you have specific areas of pain or limitation.
Body Area
Effect of Prolonged Sitting
Exercises to Counteract
Hip Flexors
Become tight and shortened
Hip Flexor Stretch, Standing Leg Raises
Glutes & Hip Extensors
Become weak from inactivity
Glute Squeezes, Seated Marching
Chest Muscles
Become tight from hunching forward
Chest Doorway Stretch
Upper Back
Rounded curve, muscles become overstretched and weak
Upper Back Strengthener, Upper Back Mobility Exercise
Neck
Forward head position strains muscles and joints
Neck Side Stretch, Chin Tucks, Neck Strengthening
Moving Forward
Sitting at a desk doesn’t have to lead to stiffness, pain, and poor posture. With regular stretching, targeted strengthening, frequent movement breaks, and creative ways to add activity to your day, you can counteract the effects of sedentary work.
Start small by adding just one or two strategies this week. As these become habits, add more. Over time, these small changes can create improvements in how you feel during and after your workday.
The goal isn’t perfection but progress. Every stretch, every standing break, and every extra step helps protect your posture, mobility, and overall health. Your body will thank you for the movement, no matter how you find ways to add it to your day.
Disclaimer: This article is for general information only and does not replace professional medical advice. Talk with your doctor or pharmacist before making changes to your health care, and call 911 in an emergency.
Strength Training for Complete Beginners How to Start Lifting Weights Safely in Your 40s, 50s, and Beyond
If you’ve never lifted weights before, the idea of starting now might feel intimidating. You might worry about looking foolish, getting injured, or whether you’re “too old” to begin. The good news is that strength training is one of the beneficial forms of exercise you can do at any age, and complete beginners often see improvements in muscle strength, bone density, balance, and everyday function.
Starting a strength training program in your 40s, 50s, or beyond requires a thoughtful approach, but it doesn’t have to be complicated. This guide will walk you through the fundamental principles, proper techniques, and safety practices that will help you build strength confidently and sustainably.
Why Strength Training Matters After 40
As we age, we naturally lose muscle mass and bone density. This process accelerates after middle age and contributes to weakness, falls, fractures, and difficulty with daily activities like carrying groceries, getting up from a chair, or climbing stairs.
Strength training directly counteracts these changes. Regular resistance exercise helps maintain and build muscle, strengthens bones, improves balance, supports joint health, and helps manage weight. It can also improve insulin sensitivity, support heart health, and boost mood and cognitive function.
The key point is this: you don’t need to have exercised in the past to benefit now. Your muscles and bones respond to strength training at any age.
Basic Strength Training Principles
Strength training works by challenging your muscles with resistance, which causes them to adapt and grow stronger over time. This happens through a process called progressive overload, which simply means gradually increasing the challenge as your body adapts.
You create this challenge by lifting weights, using resistance bands, or working against machines. The resistance causes small, controlled stress to your muscle fibers, which then repair and rebuild stronger during rest periods.
For beginners, the most important principle is consistency over intensity. Starting with lighter weights and focusing on proper form will create better long-term results than trying to lift heavy too soon. Your body needs time to adapt not just in your muscles, but also in your tendons, ligaments, and joints.
Understanding Progressive Overload for Beginners
Progressive overload doesn’t mean adding weight every single workout. For complete beginners, especially those over 40, progress happens in several ways.
You might start by simply learning the movement patterns with very light weights or even no weight at all. Then you gradually add weight in small increments. You can also progress by adding more repetitions, adding more sets, or improving your form and control.
A safe approach is to stay with the same weight until you can complete all your planned sets and repetitions with good form and moderate effort. When that feels manageable, you can add a small amount of weight. For upper body exercises, increases of one to three pounds are appropriate. For lower body exercises, increases of three to five pounds work well.
Patience is essential. Increasing weights too quickly is a common cause of injury and setbacks for new lifters.
Choosing Between Free Weights, Machines, and Resistance Bands
Each type of resistance tool has advantages and disadvantages, and many people benefit from using a combination.
Machines are often beginner-friendly. They guide your movement along a fixed path, which reduces the risk of moving incorrectly. They’re especially helpful when you’re learning how a particular muscle group should feel during an exercise. The main limitation is that machines don’t challenge your stabilizing muscles as much, and they may not fit all body sizes comfortably.
Free weights include dumbbells, barbells, and kettlebells. They require you to control the movement in all directions, which builds functional strength and engages stabilizing muscles. Dumbbells are particularly useful for beginners because you can start very light and each arm works independently, which helps identify and correct strength imbalances. The trade-off is that free weights require more attention to form and technique.
Resistance bands provide a different type of resistance that increases as you stretch the band. They’re portable, inexpensive, and gentle on joints. They’re useful for warming up, for traveling, and for certain exercises where the resistance pattern matches well with natural movement. The main limitation is that it can be harder to measure and track progressive overload precisely.
For complete beginners, starting with a mix of machines and light dumbbells often works well. As you gain confidence and learn proper form, you can incorporate more free weight exercises.
Foundational Exercises and Proper Form
A well-rounded strength program includes exercises that work all major muscle groups: legs, hips, back, chest, shoulders, and arms.
Some foundational movements form the basis of strength programs:
Squats work your legs, hips, and core. Stand with feet about shoulder-width apart, toes pointing slightly outward. Lower yourself as if sitting back into a chair, keeping your chest up and knees tracking over your toes. Press through your heels to stand back up. You can start by practicing this movement without any weight, holding onto a sturdy surface for balance if needed.
Deadlifts or hip hinges strengthen your back, hips, and legs. This movement involves bending at the hips while keeping your back straight, then standing back up. Beginners can start with very light dumbbells held at your sides or practice the movement pattern with no weight at all.
Chest press exercises work your chest, shoulders, and triceps. You can do these with dumbbells on a bench, lying on the floor, or using a chest press machine. Start with the weight at chest level and press upward until your arms are extended, then lower back down with control.
Rows strengthen your upper back and biceps. Using dumbbells, a cable machine, or a rowing machine attachment, you pull weight toward your torso while keeping your back straight and squeezing your shoulder blades together.
Overhead press movements work your shoulders and triceps. Press weights from shoulder height up overhead, then lower them back down with control.
Core exercises strengthen your abdominal and lower back muscles, which support nearly every other movement. Simple exercises like planks, bird dogs, and dead bugs are good starting points.
The Critical Importance of Proper Form
Good form serves two purposes: it keeps you safe and it ensures the intended muscles are actually doing the work.
For every exercise, focus on these general principles:
Move through a full range of motion that feels comfortable for your body. Control the weight in both directions rather than using momentum or dropping the weight. Keep your core engaged to protect your spine. Breathe steadily, exhaling during the exertion phase and inhaling during the easier phase.
Your spine position matters greatly. For many exercises, maintain the natural curves of your spine rather than rounding your back or overarching. If you’re unsure whether your back position is safe, working with a qualified personal trainer for even a few sessions can be invaluable.
Don’t sacrifice form to lift heavier weight or complete more repetitions. If your form breaks down, the set is over. Lower the weight or take a rest before continuing.
How to Choose Your Starting Weights
This question worries many beginners, but the answer is simpler than you might think: start lighter than you think you need to.
For your first workout with a new exercise, choose a weight that feels quite easy. You should be able to complete 10 to 12 repetitions while maintaining good form and feeling like you could do several more. This very light starting point lets you practice the movement pattern and see how your body responds over the next day or two.
Many beginners experience muscle soreness after their first few workouts, even when the weights felt easy during the session. This delayed onset muscle soreness is normal and typically peaks one to two days after exercise. Starting light helps keep this soreness manageable rather than debilitating.
At your second or third session with an exercise, you can adjust the weight based on how that first session felt. If you barely felt anything during or after, you can increase the weight. If you were very sore or the form was challenging, stay with the same weight.
A good working weight for exercises should feel moderately challenging during the last few repetitions of your final set, but still allow you to maintain good form throughout.
Safe Progression Timelines
The speed of progression varies greatly from person to person and depends on factors like your starting fitness level, consistency, nutrition, sleep, and stress levels.
In your first few weeks, much of your improvement comes from neuromuscular adaptation. This means your nervous system is learning to recruit muscle fibers more efficiently. You might feel significantly stronger without actually building much muscle tissue yet. This is normal and beneficial.
After this initial learning phase, actual muscle building takes more time. For complete beginners following a consistent program, noticeable strength improvements often become apparent within four to eight weeks. Visible changes in muscle tone typically take longer, often several months.
Realistic expectations help you stay motivated. Progress after 40 may happen more gradually than for younger adults, but it does happen. Comparing yourself only to your own previous performance, not to others, keeps you focused on steady improvement.
Plan to add weight or increase difficulty every two to four weeks for a given exercise, but listen to your body. Some exercises might progress faster than others, and that’s fine.
Recovery Needs and Workout Frequency
Recovery is when your muscles actually repair and strengthen. Without adequate recovery, you risk injury, exhaustion, and poor results.
For complete beginners over 40, starting with two strength training sessions per week allows your body to adapt while providing enough stimulus for improvement. These sessions should be separated by at least one rest day, and ideally two. As you adapt over several months, you might increase to three sessions per week.
Each muscle group generally needs about 48 hours of recovery before being worked hard again. A common approach is to do full-body workouts with rest days in between, or to alternate between upper body and lower body workouts on different days.
Nutrition also supports recovery, particularly adequate protein intake. Research suggests that older adults may benefit from consuming protein throughout the day with meals. Good protein sources include lean meats, fish, eggs, dairy products, beans, lentils, and soy products.
Don’t confuse rest days with complete inactivity. Light activity like walking, gentle stretching, or the low-impact cardio options discussed in Part 5 of this series can support recovery by increasing blood flow without stressing recovering muscles.
Recognizing and Avoiding Injury
Some muscle soreness, especially when starting out, is normal and expected. However, sharp pain, joint pain, or discomfort that worsens with movement are warning signs that something is wrong.
Learn to distinguish between muscle fatigue and pain. Muscle fatigue during a set feels like a burning sensation and difficulty completing the movement. This is normal during the last few repetitions of a challenging set. Pain, especially sharp or shooting sensations, is a signal to stop immediately.
Joint pain during or after strength training is not normal and often indicates a form problem, inappropriate weight selection, or an underlying issue that needs attention. If you experience persistent joint pain, consult a doctor or physical therapist before continuing.
Common injury risks for beginners include lifting too much weight too soon, using poor form, not warming up adequately, and not allowing enough recovery time.
A simple warm-up of five to ten minutes of light activity that raises your heart rate slightly and moves your joints through their range of motion helps prepare your body for strength work. This might include walking, easy cycling, or dynamic stretching movements.
Special Considerations for Adults Over 40
If you have any chronic health conditions, take prescription medications, have had recent surgery or injury, or haven’t been physically active in a long time, checking with your doctor before starting a strength training program is wise.
Certain conditions may benefit from modified approaches. Talk with your doctor or physical therapist about any specific considerations for your situation.
If you take medications for diabetes, be aware that exercise can affect blood sugar. Review your exercise plans with your doctor, especially regarding medication timing and monitoring blood sugar around workouts.
Balance can be a concern when handling weights, particularly for exercises performed standing. Using machines, sitting for certain exercises, or staying near a wall or sturdy surface for balance can reduce fall risk as you build strength and confidence.
Some people experience dizziness when changing positions quickly, such as moving from lying to sitting. Make position changes slowly and deliberately, and ensure you feel steady before picking up weights.
If you experience chest pain, severe shortness of breath, sudden dizziness, or other concerning symptoms during exercise, stop immediately and call 911 if symptoms are severe or don’t resolve quickly with rest.
Working with Professionals
While many people successfully start strength training on their own using reliable resources, working with qualified fitness professionals can accelerate learning and reduce injury risk.
A certified personal trainer with experience working with older adults can teach proper form, design a program appropriate for your goals and limitations, and provide accountability. Even a few sessions can be valuable for learning foundational movements correctly.
Physical therapists can be particularly helpful if you have existing injuries, chronic pain, or significant movement limitations. They can assess your specific situation and provide exercises that work around or address those issues.
Many gyms and community centers offer group strength training classes designed for older adults. These provide instruction, social connection, and often a more affordable option than individual training.
Creating Your Beginning Program
A simple starting program for complete beginners might include two full-body workouts per week, each containing one exercise for each major muscle group.
Each workout might include a leg exercise like squats or leg presses, a pushing exercise for the chest and arms like a chest press, a pulling exercise for the back like a row, a shoulder exercise like an overhead press, and a core exercise.
Start with one to two sets of 8 to 12 repetitions for each exercise. This range can help build both strength and muscle for beginners. Rest for one to two minutes between sets to allow recovery.
The entire workout might take 30 to 45 minutes, including warm-up and cool-down. You don’t need to spend hours in the gym to see benefits.
Keep a simple log of what exercises you did, how much weight you used, and how many repetitions you completed. This tracking helps you apply progressive overload systematically and provides motivating evidence of your progress.
Building Confidence Over Time
Starting something new, especially something physical, can feel uncomfortable at first. Many beginners worry about looking out of place or not knowing what to do.
Remember that everyone in every gym started as a complete beginner at some point. Many people are focused on their own workouts.
If you feel self-conscious about going to a gym, you might start with home workouts using a basic set of dumbbells or resistance bands, as discussed in Part 1 of this series. As you build strength and confidence at home, transitioning to a gym environment often feels less intimidating.
Many people find that strength training becomes genuinely enjoyable once they move past the initial learning curve. The sense of accomplishment from lifting more than you could last month, the improved ability to do everyday tasks, and the positive changes in how your body feels can be deeply satisfying.
Equipment Type
Advantages
Limitations
Machines
Guide movement along fixed path; beginner-friendly; help you feel which muscles should work
Don’t challenge stabilizing muscles as much; may not fit all body sizes
Free Weights
Control movement in all directions; build functional strength; dumbbells allow each arm to work independently
Require more attention to form and technique
Resistance Bands
Portable; inexpensive; gentle on joints; good for warming up and traveling
Harder to measure and track progressive overload precisely
Moving Forward
Strength training is a skill that you’ll continue learning and refining over months and years. Your first workouts don’t need to be perfect. They just need to happen.
Focus on consistency, proper form, gradual progression, and adequate recovery. These four principles will serve you well whether you’re just starting or years into your strength training journey.
The strength you build through resistance training supports every other aspect of an active life. It makes the movements discussed in Part 4 of this series easier, enhances your ability to enjoy the cardiovascular activities in Part 5, and helps protect your joints as mentioned in Part 2.
You’re not too old to start, and it’s not too late to build meaningful strength. With a thoughtful, patient approach, you can safely develop a stronger, more capable body that serves you well for decades to come.
Disclaimer: This article is for general information only and does not replace professional medical advice. Talk with your doctor or pharmacist before making changes to your health care, and call 911 in an emergency.
Exercise and Arthritis Why Moving More (Not Less) Reduces Joint Pain After 50
If you have arthritis, you might think the best way to protect your joints is to use them less. It’s natural to want to rest when movement hurts. But research shows that too much rest can actually make joint pain and stiffness worse over time.
The truth is that regular, gentle movement is one of the ways to manage arthritis symptoms. Exercise helps reduce inflammation, strengthens the muscles that support your joints, and keeps cartilage healthy. When you understand how to move safely with arthritis, you can enjoy less pain and more independence in your daily life.
How Exercise Reduces Inflammation and Arthritis Symptoms
When you have arthritis, inflammation causes swelling, pain, and stiffness in your joints. Physical activity helps reduce this inflammation in several ways.
Movement increases blood flow to your joints, bringing oxygen and nutrients while removing waste products. This improved circulation helps reduce swelling and promotes healing. Exercise also triggers your body to release natural anti-inflammatory substances that can ease joint pain.
Regular physical activity strengthens the muscles around your joints. Stronger muscles act like shock absorbers, taking pressure off the joint surfaces themselves. This reduces wear and tear while making everyday movements easier and less painful.
Activity also helps maintain the health of your cartilage, the cushioning tissue between your bones. Cartilage doesn’t have its own blood supply, so it relies on movement to pump nutrients in and waste out. When you stay active, you’re actually feeding your cartilage and helping it stay resilient.
Exercise can also help you maintain a healthy weight, which takes additional pressure off weight-bearing joints like your hips, knees, and ankles. Even modest weight changes can make a meaningful difference in joint pain levels.
Beyond the physical benefits, regular movement improves mood and sleep quality, both of which affect how you experience pain. Many people find that staying active helps them feel more in control of their condition rather than limited by it.
Which Types of Movement Are Safe for Arthritic Joints
Not all exercise is created equal when you have arthritis. The key is choosing activities that move your joints through their full range of motion without putting too much stress on them.
Low-impact aerobic activities are generally safe and beneficial for arthritic joints. Walking is one of the most accessible options. Start with short distances on flat, even surfaces and gradually increase your time as you build endurance. Water-based exercise is particularly gentle because the water supports your body weight while providing resistance to strengthen muscles.
Range-of-motion exercises help maintain and improve joint flexibility. These gentle movements take each joint through its normal movement pattern. Simple activities like shoulder circles, ankle rotations, or knee bends done slowly and carefully can reduce stiffness and keep joints functioning well.
Strengthening exercises build the muscles that protect your joints. You can use resistance bands, light weights, or your own body weight. The focus should be on controlled movements rather than heavy loads. Part 3 of this series covers strength training basics for beginners.
Stretching and flexibility work help maintain your ability to move comfortably through daily activities. Gentle yoga or tai chi can improve balance, flexibility, and strength while being easy on your joints. These practices also include breathing and relaxation techniques that may help with pain management.
Activities to approach with caution include high-impact exercises like running or jumping, which can jar arthritic joints. Contact sports and activities that involve sudden stops, starts, or twisting motions may also increase joint stress. This doesn’t mean you must avoid these forever, but start with gentler options and talk with your doctor about when or if you might progress to more intense activities.
How to Distinguish Between Beneficial Discomfort and Harmful Pain
Learning to read your body’s signals is essential when exercising with arthritis. Some discomfort during and after exercise is normal, but certain types of pain mean you should stop or modify what you’re doing.
Normal exercise discomfort feels like mild muscle tiredness or a gentle pulling sensation during stretching. You might feel some increased stiffness or soreness for up to two hours after exercise, especially when you’re starting a new activity. This type of discomfort should gradually decrease as your body adapts to regular movement.
Warning signs that you’re overdoing it include sharp or stabbing pain during an activity. If a movement causes sudden, intense pain, stop immediately. Pain that gets worse as you continue exercising rather than staying stable or improving is another red flag.
Pay attention to how you feel in the hours after exercise. Some increased soreness the next day is normal when you’re building strength, but pain that lasts more than two hours after you stop exercising, or that’s significantly worse than before you started, suggests you may have pushed too hard. Increased swelling in a joint after exercise also indicates you should scale back.
The “two-hour rule” can be helpful. If you have more pain two hours after exercising than you did before you started, you’ve done too much. Next time, reduce the intensity, duration, or number of repetitions.
Keep in mind that arthritis symptoms can vary from day to day. On days when your joints are particularly painful or swollen, it’s fine to do less or choose gentler activities. Listen to your body rather than forcing yourself to maintain the same routine regardless of how you feel.
If you experience chest pain, trouble breathing, or dizziness during exercise, stop immediately and call 911. These are emergency warning signs that require immediate medical attention.
Modifications for Common Exercises When Dealing with Arthritis
You don’t have to give up activities you enjoy because of arthritis. Often, small modifications can make exercises safer and more comfortable.
For walking, choose supportive shoes with good cushioning and replace them regularly as they wear out. Walking poles can reduce stress on hip and knee joints while improving balance. If outdoor walking is difficult, try walking in a shopping mall where the surface is smooth and climate-controlled, or consider a treadmill where you can control the pace and stop whenever needed.
When doing exercises on the floor, use extra padding under your knees or hands. A yoga mat, folded towel, or foam pad can make positions more comfortable. If getting down to the floor is challenging, many floor exercises can be adapted to a chair or bed.
For strength exercises, start with very light resistance or no added weight at all. Master the movement pattern with good form before gradually adding resistance. Resistance bands often feel more joint-friendly than free weights because the resistance is more evenly distributed throughout the movement.
If gripping weights or equipment is painful for your hands, look for options with larger, cushioned handles. You can also wrap handles with foam padding or grip tape to make them easier to hold. Weighted gloves or ankle weights eliminate the need to grip anything.
When doing squats or lunges, reduce how far down you go. A quarter squat or half squat still strengthens your legs while putting less stress on your knees. You can also hold onto a counter or sturdy chair for support.
For exercises that require getting up and down, keep a sturdy chair nearby. It’s fine to use your hands to push yourself up rather than relying solely on leg strength. There’s no prize for making movements harder than they need to be.
Warm up before exercising by moving gently for a few minutes or applying warmth to stiff joints. A warm shower, heating pad, or warm towel can help joints feel more comfortable before you begin. After exercise, you might prefer cold packs to reduce any inflammation, though some people find warmth helpful at this time too. Experiment to see what works best for you.
When to Consult a Doctor Before Increasing Activity Levels
While exercise is generally safe and beneficial for people with arthritis, certain situations call for medical guidance before you begin or change your routine.
Talk with your doctor before starting a new exercise program if you haven’t been physically active for a long time. Your doctor can help you understand any limitations specific to your condition and may suggest working with a physical therapist to develop a safe starting point.
If you have other health conditions in addition to arthritis, medical guidance is particularly important. Conditions affecting your heart, lungs, blood sugar, or balance may require special precautions when exercising. Your doctor can advise you on warning signs to watch for and how to exercise safely given your full health picture.
Consult your doctor if you experience new joint pain or if existing arthritis pain suddenly becomes much worse. A significant change in symptoms could indicate a flare-up that needs medical attention or a different problem altogether.
If you’ve had joint surgery or are planning a procedure, ask your surgeon about appropriate exercise both before and after the operation. Specific guidelines will depend on the type of surgery and your individual healing process.
You should also seek medical advice if you consistently have pain that lasts more than two hours after exercise despite modifications, or if you notice increasing joint swelling or warmth. These signs might indicate that your current activity level isn’t right for you, or that your arthritis needs different management.
A physical therapist can be particularly helpful when you’re starting to exercise with arthritis. These specialists can teach you proper form, suggest appropriate modifications, and design a program tailored to your specific joints and symptoms. Many people benefit from just a few sessions to learn the basics before continuing on their own.
Making Movement a Sustainable Habit
The benefits of exercise for arthritis come from regular, consistent activity rather than occasional intense workouts. Building sustainable habits matters more than pushing yourself hard.
Start slowly and increase gradually. If you’re new to exercise, even five or ten minutes a day makes a difference. You can slowly add more time or intensity as your body adapts. Small, regular sessions are more beneficial than sporadic long workouts.
Choose activities you actually enjoy or at least don’t mind doing. You’re much more likely to stick with walking, dancing, or gardening than with exercises that feel like punishment. The exercise that works well for arthritis is the one you’ll actually do.
Plan for setbacks without giving up entirely. Arthritis symptoms fluctuate, and some days you’ll need to do less or rest completely. This doesn’t erase your progress. Return to activity when you’re able, even if you need to start at a lower level than before.
Consider exercising at the time of day when your joints typically feel best. Some people with arthritis have less stiffness later in the morning after moving around a bit, while others feel better earlier in the day. Pay attention to your patterns and work with them.
Exercise Type
Safe for Arthritic Joints
Approach with Caution
Aerobic
Walking, water-based exercise
Running, jumping
Flexibility
Range-of-motion exercises, gentle yoga, tai chi
Activities with sudden twisting
Strengthening
Resistance bands, light weights, body weight exercises
Heavy loads
Sports
Low-impact activities
Contact sports, sudden stops/starts
Moving Forward with Confidence
Having arthritis doesn’t mean accepting a sedentary life or steadily increasing pain. Movement is medicine for your joints, and you have more control over your symptoms than you might think.
Start where you are, with activities that feel manageable today. Listen to your body, make modifications as needed, and gradually build your strength and endurance. The discomfort of starting something new is temporary, but the benefits of regular movement can last a lifetime.
With patience and consistency, many people find that exercise helps them do more of what they love with less pain. Your joints were made to move, and keeping them moving is one of the things you can do for your long-term health and independence.
Disclaimer: This article is for general information only and does not replace professional medical advice. Talk with your doctor or pharmacist before making changes to your health care, and call 911 in an emergency.
How to Build a Home Workout Routine Without Expensive Equipment or a Gym Membership
Starting a fitness routine doesn’t require a gym membership or a garage full of equipment. With just your body weight and a few simple tools, you can build strength, improve balance, and boost your energy right in your living room or bedroom.
Many adults over 50 find that exercising at home fits better into their schedules and feels more comfortable than joining a gym. The key is knowing which exercises to do, how to organize them into a routine, and how to progress safely over time.
Essential Bodyweight Exercises for a Full-Body Routine
Bodyweight exercises use your own weight as resistance to build muscle and improve cardiovascular health. These movements work multiple muscle groups at once and require no equipment at all.
For your lower body, squats and sit-to-stands are foundational movements. To do a squat, stand with feet hip-width apart and lower yourself as if sitting into a chair, then stand back up. If full squats feel too challenging, practice sitting down into a sturdy chair and standing up without using your hands. Lunges, where you step forward and lower your back knee toward the floor, help improve balance and leg strength.
For your upper body, wall push-ups offer a gentle starting point. Stand facing a wall at arm’s length, place your palms against it, and lean in by bending your elbows, then push back. As you get stronger, you can progress to push-ups against a countertop, then a coffee table, and eventually the floor. Arm circles and shoulder presses without weights still engage the muscles in your shoulders and arms.
For your core, modified planks build stability throughout your midsection. Start by holding a plank position with your forearms on the floor and knees down, keeping your back straight. Lying leg raises, where you lie on your back and lift one leg at a time, strengthen the lower abdominal muscles without straining the neck.
For balance and stability, single-leg stands are simple but effective. Stand near a wall or counter for safety, lift one foot slightly off the ground, and hold for several seconds. Heel-to-toe walks, where you walk in a straight line placing the heel of one foot directly in front of the toes of the other, help improve coordination.
How to Structure a Weekly Workout Schedule at Home
A balanced weekly schedule includes strength exercises, activities that get your heart rate up, and movements that maintain flexibility. The general guidance from public health organizations suggests adults aim for muscle-strengthening activities on two or more days per week, along with regular aerobic activity.
A sample weekly structure might include strength-focused workouts on Monday, Wednesday, and Friday, with lighter movement or cardio-style activities on Tuesday and Thursday. Many people take one or two days for complete rest or very gentle stretching.
On strength days, focus on exercises that work all major muscle groups: legs, hips, back, abdomen, chest, shoulders, and arms. You don’t need to spend hours exercising—sessions lasting 20 to 40 minutes can be helpful when done consistently.
For cardio at home, try marching in place, stepping side to side, or doing a series of exercises back-to-back with minimal rest. Activities like climbing stairs, if you have them, or walking briskly around your home also count. Part 5 of this series covers comparisons between different cardio options.
Start each session with a warm-up of five to ten minutes of gentle movement to increase blood flow and prepare your joints. End with a few minutes of stretching while your muscles are warm to maintain flexibility.
Low-Cost Equipment Alternatives and Household Items That Work
You can create resistance using items you already have at home. A few small purchases can add variety, but they’re not essential when you’re starting out.
For added resistance, canned goods or filled water bottles work as light hand weights. A gallon jug filled with water weighs about eight pounds and has a built-in handle. Laundry detergent bottles or bags of rice can also serve as weights for exercises like bicep curls or overhead presses.
For cushioning and comfort, a folded towel or blanket provides padding under your knees during floor exercises. A yoga mat is a reasonably priced option if you prefer a dedicated surface, but it’s not necessary.
For support and stability, a sturdy chair without wheels becomes valuable exercise equipment. Use it for seated exercises, balance support, or modified push-ups. The back of a sofa or a kitchen counter works well for holding onto during standing leg exercises.
For resistance training, resistance bands are lightweight, inexpensive, and versatile. These stretchy loops or bands with handles can be used for dozens of exercises targeting every muscle group. Look for sets that include bands of varying resistance levels so you can adjust the difficulty.
For added challenge, a set of light dumbbells offers more options as you progress, though they’re not required. Ankle weights that strap around your lower legs can make leg lifts more challenging.
Space Requirements and Setup for Home Workouts
Most home workouts require surprisingly little space. If you can lie down with your arms extended overhead and to the sides without touching furniture, you have enough room.
Minimum space needs are roughly the size of a yoga mat—about six feet long and three feet wide. Many exercises can be done in even smaller areas if you choose movements that don’t require lying down.
Choose a safe location with enough clearance around you. Move coffee tables, throw rugs that might slip, and other obstacles out of the way. Make sure you have something stable nearby to hold onto if needed for balance.
Flooring considerations matter for comfort and safety. Carpet provides some cushioning, but very thick or soft carpet can make balance exercises harder. Hard floors like wood or tile work well but may feel uncomfortable for exercises that involve kneeling or lying down. Adding a mat or towel solves this issue.
Keep equipment accessible by storing your workout items in a basket or small bin. When everything is in one place, you’re more likely to exercise regularly. Some people leave their mat rolled up in a corner or keep their resistance bands hanging on a hook as a visual reminder.
Temperature and ventilation affect your comfort during exercise. A room that feels slightly cool at rest will feel comfortable once you start moving. Opening a window or using a fan helps with airflow.
Sample Beginner Home Routine
This routine is designed for someone new to structured exercise or returning after a long break. The focus is on learning proper form and building a habit rather than intensity.
Warm-up (5 minutes): March in place, do arm circles forward and backward, roll your shoulders, and do gentle side-to-side steps.
Main exercises (repeat the circuit 1-2 times):
– Wall push-ups: 8-10 repetitions
– Sit-to-stands from a chair: 8-10 repetitions
– Standing marches, bringing knees up: 20 repetitions (10 per leg)
– Seated torso twists: 10 repetitions per side
– Single-leg stands: Hold for 10 seconds per leg
Cool-down (5 minutes): Gentle stretches for the legs, arms, shoulders, and back, holding each stretch for 15-30 seconds without bouncing.
Do this routine two to three times per week, with at least one rest day between sessions. As it becomes easier over several weeks, add more repetitions or another round through the circuit.
Sample Intermediate Home Routine
This routine suits someone who has been exercising regularly for a few months and is ready for more challenge. Movements become more dynamic and you’ll hold positions longer.
Warm-up (5-7 minutes): Brisk marching, arm swings, hip circles, and gentle lunges.
Circuit 1 (repeat 2-3 times):
– Squats (no chair): 12-15 repetitions
– Modified push-ups from knees or elevated surface: 10-12 repetitions
– Alternating lunges: 10 per leg
– Plank hold on knees or toes: 20-30 seconds
Circuit 2 (repeat 2-3 times):
– Standing leg lifts to the side: 12 per leg
– Resistance band rows (if you have a band): 12-15 repetitions
– Bicycle crunches lying on your back: 10 per side
– Single-leg stands with eyes closed: 15-20 seconds per leg
Cool-down (5-7 minutes): Stretches for all major muscle groups.
Aim for three to four sessions per week. You can split circuits across different days or do the full routine in one session.
Sample Advanced Home Routine
This routine is for someone who has been exercising consistently and wants to maintain or increase strength and endurance using only bodyweight.
Warm-up (7-10 minutes): Dynamic movements including high knees, butt kicks, inchworms, and arm sweeps.
Circuit 1 (repeat 3 times):
– Single-leg squats or pistol squat progressions: 8-10 per leg
– Standard push-ups from toes: 12-15 repetitions
– Jumping or step-back lunges: 10 per leg
– Plank with alternating leg lifts: 10 per leg
Circuit 2 (repeat 3 times):
– Glute bridges with single-leg hold: 10 per leg
– Pike push-ups (for shoulders): 10-12 repetitions
– Mountain climbers: 20 total
– Side plank hold: 30-45 seconds per side
Cool-down (7-10 minutes): Extended stretching and deep breathing.
This level of routine can be done four to five times per week, with attention to how your body feels and adequate rest between intense sessions.
Tips for Staying Consistent and Progressing Safely
Set a regular time for your workouts rather than trying to fit them in whenever you have free time. Many people find that morning sessions happen more reliably, but the best time is whenever you’ll actually do it.
Track your workouts in a simple notebook or calendar. Write down what you did and how it felt. Seeing your consistency build over weeks provides motivation.
Progress gradually by adding just one or two more repetitions each week, holding positions a few seconds longer, or making small adjustments to make movements more challenging. Rushing progress increases the risk of injury.
Listen to your body and distinguish between the mild discomfort of working muscles and pain that signals a problem. Soreness that appears a day or two after exercise is normal. Sharp pain during an exercise, pain in joints rather than muscles, or discomfort that doesn’t improve with rest should prompt you to stop that movement and consider checking with a healthcare provider.
Stay hydrated by drinking water before, during, and after your workout. Individual needs vary based on the intensity of exercise, temperature, and personal factors.
Watch your form more than your speed. Doing exercises correctly protects your joints and makes the movements more effective. If you’re unsure about proper form, many free online resources demonstrate bodyweight exercises. A single session with a physical therapist or personal trainer can also provide valuable guidance.
Mix up your routine every few weeks to prevent boredom and continue challenging your body in new ways. Changing the order of exercises, trying new movements, or adjusting the tempo keeps things interesting.
Day
Activity Type
Example
Monday
Strength
Full-body exercises (legs, core, upper body)
Tuesday
Cardio
Marching in place, stepping side to side
Wednesday
Strength
Full-body exercises (legs, core, upper body)
Thursday
Cardio
Climbing stairs, brisk walking
Friday
Strength
Full-body exercises (legs, core, upper body)
Saturday/Sunday
Rest or stretching
Gentle stretching or complete rest
Making Home Exercise a Long-Term Habit
The convenience of home workouts removes many common barriers to exercise. You don’t need to drive anywhere, wait for equipment, or worry about what you’re wearing.
Create a mental shift by designating your workout space, even if it’s just temporarily clearing an area in your living room. This signals to your brain that it’s time to exercise.
Find what you enjoy within the structure of a complete program. Some people prefer following along with video workouts, while others like the quiet of exercising on their own. Some enjoy counting repetitions, while others prefer timing each exercise.
Connect movement to how you feel afterward rather than just viewing it as something you should do. Many people notice improved energy, better sleep, and a sense of accomplishment from regular exercise. These intrinsic rewards often matter more than external goals.
Building a home workout routine offers flexibility, privacy, and cost savings while delivering health benefits similar to gym-based programs. With the exercises and structures outlined here, you have everything needed to create a fitness practice in whatever space you have available.
Disclaimer: This article is for general information only and does not replace professional medical advice. Talk with your doctor or pharmacist before making changes to your health care, and call 911 in an emergency.
Can Massage Therapy Help Plantar Fasciitis? Comparing Foam Rolling, Massage Guns, and Professional Treatment
If you’ve been dealing with that stabbing heel pain from plantar fasciitis, you’ve probably wondered whether massage could help. The short answer is that massage approaches may offer relief for some people, though they work best as part of a broader treatment plan rather than as a standalone cure.
Let’s look at what different massage methods can and cannot do for plantar fasciitis, from tools you can use at home to professional treatment options.
How Massage May Help Plantar Fasciitis Symptoms
The plantar fascia is a thick band of tissue running along the bottom of your foot from your heel to your toes. When it becomes inflamed or develops small tears, the result is plantar fasciitis. Massage techniques aim to address this condition in several ways.
Massage may help reduce tension in the plantar fascia itself and in the calf muscles that connect to it. When calf muscles are tight, they can pull on the Achilles tendon, which in turn increases stress on the plantar fascia. By working on both areas, massage may help reduce some of this mechanical stress.
Massage also encourages blood flow to the affected area, which may support the body’s natural healing processes. Additionally, many people find that massage provides temporary pain relief, which can make it easier to stay active and do other helpful activities during recovery.
That said, massage is not a quick fix. Research suggests it works best when combined with other approaches, and results vary considerably from person to person.
Proper Techniques for Foam Rolling the Foot and Calf
Foam rolling is one of the most accessible self-massage options because the equipment is inexpensive and easy to use at home. For plantar fasciitis, you’ll want to focus on both your foot and your calf muscles.
For the bottom of your foot, you can use a small foam roller, a tennis ball, or a specialized massage ball. While seated in a sturdy chair, place the ball or roller under your foot and apply gentle pressure as you roll it from your heel toward the ball of your foot. Move slowly and pause on any spots that feel particularly tight or tender, but avoid pressing so hard that you cause sharp pain.
Work on this for a few minutes at a time, ideally once or twice daily. Some people find it helpful to do foot rolling in the morning before taking those first painful steps, or in the evening while watching television.
For calf rolling, sit on the floor with your legs extended and place a foam roller under one calf. Use your hands to lift your hips slightly off the floor and roll slowly from just above your ankle to just below your knee. You can rotate your leg slightly from side to side to reach different parts of the calf muscle.
If you have diabetes, peripheral neuropathy, or poor circulation in your legs and feet, check with your doctor before starting any self-massage routine. Reduced sensation can make it harder to judge appropriate pressure, and some conditions require modified techniques.
Benefits and Limitations of Massage Guns for Foot Pain
Massage guns, also called percussion massage devices, have become popular in recent years. These handheld tools deliver rapid pulses of pressure to muscles and soft tissue. For plantar fasciitis, they offer some potential benefits but also important limitations.
The main advantage of massage guns is that they can deliver consistent pressure without tiring out your hands, which can be helpful when working on tight calf muscles. The percussion action may help reduce muscle tension for some people.
However, massage guns require careful use on the foot itself. The bottom of the foot has many small bones and nerves close to the surface, and the intense percussion can be uncomfortable if used incorrectly. Some experts recommend using massage guns on the calf muscles rather than directly on the plantar fascia.
If you do use a massage gun on your foot, choose the lowest speed setting and the softest attachment head available. Keep the device moving rather than holding it in one spot, and avoid using it directly on your heel bone or other bony areas. Stop immediately if you experience sharp pain, numbness, or tingling.
People with certain conditions should talk with their doctor before using massage guns. If you take blood-thinning medications, ask your doctor whether massage guns are safe for you.
What to Expect from Professional Massage Therapy
Professional massage therapists who work with foot and lower leg conditions can offer more targeted treatment than self-massage approaches in some cases. Understanding what to expect can help you decide whether this option is worth exploring.
A massage therapist experienced in treating plantar fasciitis will typically work on your foot, ankle, and calf during a session. They may use various techniques including deep tissue massage, trigger point therapy, and myofascial release. The therapist applies sustained pressure to tight areas and may work along the entire length of the plantar fascia and surrounding muscles.
Sessions usually last between thirty and sixty minutes. Some therapists recommend starting with weekly appointments for several weeks, then spacing them out as symptoms improve. The massage itself may cause some discomfort when the therapist works on particularly tight or tender areas, but it should not cause sharp or unbearable pain.
Professional therapists can adjust their pressure and technique based on your feedback and can reach areas that are difficult to treat on your own. They may also provide guidance on self-massage techniques you can do between appointments.
It’s worth noting that massage therapists cannot diagnose medical conditions or prescribe treatment plans. If you haven’t already seen a doctor about your heel pain, it’s wise to get a proper diagnosis before investing in massage therapy. Some conditions that mimic plantar fasciitis require different treatment approaches.
Evidence Comparing Self-Massage Versus Professional Treatment
Research on massage for plantar fasciitis suggests that both self-massage and professional treatment may provide benefits for some people, though the evidence has limitations.
Studies examining self-massage techniques generally find that regular practice may lead to modest improvements in pain and function over several weeks. The advantage of self-massage is that you can do it daily without the cost of professional appointments. The disadvantage is that it requires consistency and proper technique, and some people find it difficult to apply adequate pressure to their own feet.
Research on professional massage therapy also suggests potential benefits, with some studies finding short-term improvements in pain and mobility. However, the quality and design of some studies make it hard to draw firm conclusions. Professional massage offers the benefit of skilled technique and the ability to address multiple areas in one session, but it comes with ongoing costs and time commitments.
Research has not consistently shown that professional massage produces significantly better outcomes than well-performed self-massage techniques. This suggests that regular, consistent massage of some kind may be more important than whether it’s professionally administered.
One important finding across studies is that massage appears to work best when combined with other treatments. Massage alone is unlikely to resolve plantar fasciitis, but it may help reduce symptoms while you address other factors contributing to the condition.
Cost Considerations and Realistic Expectations
Making an informed decision about massage for plantar fasciitis requires understanding both the financial investment and what you can realistically expect in terms of results.
Self-massage tools are the most budget-friendly option. A foam roller or massage ball typically costs between ten and thirty dollars and can last for years. Massage guns are more expensive, with decent-quality devices starting around one hundred dollars, but they’re still a one-time purchase.
Professional massage therapy costs vary widely depending on your location and the therapist’s experience. Sessions typically range from sixty to one hundred twenty dollars or more. If a therapist recommends weekly treatments for six to eight weeks, you’re looking at a significant investment. Some health insurance plans cover massage therapy when prescribed by a doctor for a specific medical condition, so it’s worth checking your benefits.
Physical therapy, which often includes massage techniques along with other treatments, may be more likely to receive insurance coverage than standalone massage therapy. Part 1 of this series discusses other home treatment options you might combine with massage approaches.
Regarding expectations, it’s important to understand that massage is unlikely to cure plantar fasciitis on its own. Some people who find relief from massage notice gradual improvement over weeks rather than immediate results. Some people experience temporary pain reduction after massage but find that symptoms return within hours or days.
Massage is probably most useful as part of a comprehensive approach that addresses the underlying causes of your plantar fasciitis. This might include managing your activity levels, wearing appropriate footwear, and addressing muscle tightness throughout your lower leg.
Method
Cost
Key Advantages
Key Limitations
Foam Rolling / Massage Ball
$10-30 (one-time)
Can use daily at home; inexpensive
Requires consistency and proper technique; difficult to apply adequate pressure
Massage Gun
$100+ (one-time)
Delivers consistent pressure without tiring hands
Intense percussion can be uncomfortable on foot; should mainly be used on calf
Professional Massage Therapy
$60-120+ per session
Skilled technique; can adjust based on feedback; can reach difficult areas
Ongoing cost; weekly sessions for 6-8 weeks often recommended
Making Your Decision
If you’re considering massage for plantar fasciitis, starting with self-massage techniques makes sense for some people. The low cost and convenience allow you to test whether massage helps your symptoms before investing in professional treatment.
Try foam rolling or ball rolling for your foot and calf muscles once or twice daily for several weeks. Keep track of your symptoms to see whether you notice any improvement. If self-massage seems helpful but you’re having trouble reaching certain areas or applying enough pressure, that might be a good time to try professional massage therapy.
Some people find that a few sessions with a professional massage therapist or physical therapist teach them better self-massage techniques, after which they can continue treatment at home. This middle-ground approach can provide professional guidance without the ongoing cost of regular appointments.
Remember that massage should not cause severe pain. If any massage technique makes your symptoms worse or causes sharp pain, stop and consult with a healthcare provider. While massage is generally safe, plantar fasciitis can sometimes be confused with other conditions that require different treatment.
If your heel pain persists despite several weeks of massage and other home treatments, or if you develop new symptoms like numbness, swelling, or pain in both feet, schedule an appointment with a doctor or podiatrist. Persistent or worsening symptoms may indicate that you need a different treatment approach or that something else is causing your pain.
Massage can be a helpful tool in managing plantar fasciitis, but like treatments for this stubborn condition, it works best when combined with other strategies and when expectations remain realistic. Whether you choose foam rolling on your living room floor or professional sessions at a clinic, consistency and patience are key to seeing whatever benefits massage might offer for your particular situation.
Disclaimer: This article is for general information only and does not replace professional medical advice. Talk with your doctor or pharmacist before making changes to your health care, and call 911 in an emergency.